The GEST used by the fair organizers differs in some features from the platform used by other events. On this page, we go through the functions created especially for fair organizers.
All functions of GEST are indicated on the list below. You can find instructions for common features on the main page, and the links take you directly to the instructions you want. The points to which there is no link are discussed on this page.
List of functions
- Settings
- Design
- Personnel groups and form creation
- Collecting and importing exhibitor data from another file
- Management of the personnel group form
- Personnel group form settings
- Payment features
- Documents
- Export data
- Publishing settings
- Language versions
- Rights and log
- Collections and data integration
- Check-in
- Statistics
- Exhibitor's portal - quick reference
- Exhibitor app
- Updating visitor information
1. Settings
You can learn more about the settings in more detail. When starting to use GESTfor general management, it is important that the implementation of the system would be as smooth as possible. In this section, we discuss user account settings, creating usernames and data protection.
2. Planning
Organize your project into easily manageable entities with the help of a project management tool, share tasks and areas of responsibility, communicate internally and stay up-to-date on the progress of production. On this page, you can familiarize yourself with the various functions of project management and create a clear foundation for your project before starting the actual production work.
If you don't plan to use GEST for production planning yet, see how to upload files to the platform under Files.
3. Groups of people and creation of the form
See the instructions for creating a personnel group through the link in the title. After that, see below the different ways you can easily bring exhibitors into the system.
Collecting and importing exhibitor data from another file
When the personnel group form is ready and you want to compile the information about your exhibitors, you can
- Add exhibitors one at a time from the front page of the personnel group under Add new
- Publish the link on your website and/or send the link to log in to previous years' exhibitors or the companies you want, so that they log in to the event themselves
- Add the exhibitors yourself via the link in the publication settings: if you wish, the platform will send a confirmation message to the exhibitor's email.
- If you know that almost all of the previous year's exhibitors are coming, you can export the companies from the old form in csv format and import them into the new form.
- You can copy the previous year's form and then copy the persons from the old form (if you have already used GEST in the previous event)
If you want to import people from existing lists, you can read the instructions below.
You can import files via the Import tab on the right side of the person group view.

To be able to import data into GEST from outside the system, you must first download a csv table template that shows the fields of the form.

Downloading the CSV table to the computer:
- Choose a separator character and load the base (comma = PC, semicolon = Mac). This sometimes varies depending on the machine and spreadsheet tool you are using. Test which one works for you.
- Download the template to your computer.
- Open the file in a spreadsheet program.
- Complete the table with the necessary information.
- Save the completed table to your computer. CSV format.
Please note that depending on the spreadsheet program, saving in the correct format may be challenging. For example, in the latest version of Excel, saving in CSV format with the correct separator character is a few clicks away.
Here's a quick tip if you're having trouble with Excel.

1. Open a new table in Excel
2. Open the Data tab
3. Select From Text or From CSV. (You could also use the Get data function, but Excel did all the graphing there)
4. In the stepper preview, make sure that the data is displayed in columns (separated by comma) as shown in the example image.
Uploading a completed CSV table to GEST:
- Select the completed table from your computer.
- Select the table separator (comma = PC, semicolon = Mac). Remember to select the same separator when exporting and importing the table (circled in the image above).
- Select a character set.
- Specify the status of personal data.
- Press Preview.
Different spreadsheet programs produce Äääkösets in slightly different ways. You can use GEST's Preview feature to make sure that your spreadsheet program's Äääkösets display correctly using the default character set. If the Äääkösets do not display correctly, you can try other character set options from the drop-down menu. Usually, the most reliable character set is UTF-8. However, the program offers the most suitable one.
When the character set and settings are correct, click on the Import button to import the data.
4. Management of the personnel group form

In the personnel group control panel there are many different functions that allow you to customize the settings of the personnel group, import data into the system, and publish the form you created.

Settings
Here you will find all the basic settings for the person group. Recommendation: open this page in GEST and go through the functions.
Name. All name fields are created automatically after creating the form.
Event dates: Of course, the days marked in the event information tell you which days the event is on, but also from which days visitor statistics are obtained. If you want to collect data or monitor traffic from other days as well, such as during the building, take them into account when recording the start and end dates of the event.
ID tags. There are two ID tags for each form.
1. lippu.fi organizer's ID – always the same
2. lippu.fi event identifier (ID) – changes per event
The event ID primarily determines when a representative of a group of people will be allowed to enter the event. The NA badges of people added via GEST and the badges sent with guest invitations contain a QR code that can be read with Lippu.fi reader devices. When the desired ID number has been added to the group of people's information, which in Lippu.fi describes a specific access right, the person will only be allowed to enter during the specified time.
The fair organizer requests a unique identifier (ID) for each event from Lippu.fi. The organizer ID remains the same, but the event/group ID changes. Each event pass has its own identification number.

When applying for identifiers, the following must be mentioned:
- Who is the event ID for? (is it an exhibitor, customer, media, invited guest or will it be the same for all groups of people)
- When the ID is valid (date and time).
If access control is not mandatory, e.g. during the construction phase, and exhibitor access cards, etc. are not read, all groups of people at the event can be given the same identifier. In that case, all groups' access cards (QR code) have the same rights. Many trade fairs can manage with just one ID.
However, if there are many groups, it is important to limit their movement, or you want to get more accurate data on the arrival of invited guests, the number of media representatives, etc., you can create a separate ID for each desired group of people. This is especially good if there are many groups of people or the event is large.
In this case, monitoring access control requires more planning, but brings more data and helps to exclude unauthorized persons. If you want to ensure that only exhibitor employees are present during the construction phase, they can be given their own ID, which is monitored in access control.
NOTE! If exhibitors want their own identifier, they must request at least two identifiers from Lippu.fi:
- Exhibitors have their own
- Common for customers, invited guests, media and other visitors
Lippu.fi interface url. Must be selected from the drop-down menu PRODUCTION.
Pairing of groups of people and the event. The purpose is to easily connect groups of people both to each other and to different events. For example, which group of people (such as an exhibitor) can invite or add representatives of a certain group of people (invited guests) to an event. Once the connection has been established, this group of people can be selected in the exhibitor panel and the invitee's (such as the exhibitor's) invitation code will appear in the invitee's information.
Usually combined with:
- Event Exhibitors & Trade Fairs/Trade Fair Visitors/Exhibitors (Event Visitor)
- Exhibitors & Invited Guests (inviter & invitee).

Please note that the options are person forms you have created yourself. So remember to first create the person groups you want. Each trade fair organizer will combine them in a way that is best and makes sense for their event.
If exhibitors are allowed to invite companies/customers, create an Invited Guest form. Select the groups of people as follows: i.e. the first group is the inviter and the second group is the invitee.

Connecting exhibitors and their invited guests is important so that we can see who invited whom, if they have arrived and when.
With this integration, exhibitors can also see through their own invitation link which invited guests have arrived (picture below). More on this in the last section of the instructions.

NOTE! Always remember to select the event exhibitors in the exhibitor field. If you notice any problems, check this first.
Other functions of the settings
Enable Mobile app. Remember to select this if you have a mass app created for you.
Button color. You can still change colors.
Enhanced view. This is the very basic view from the front page. The selection removes features and speeds up data updates. When this function is on, no changes can be made to the personnel group data. It works during the event, but you can get more accurate and better data by leaving it out.
Allow check-in without approval. By default, you can check in only approved persons in the check-in view. By checking this item, you can also check in people with other statuses.
Create a multilingual form. If you would like the form also in English, choose this. In the upper right corner of both the registration form and the exhibitor panel, the person filling in the information can select the language of their choice. Instructions for this can be found below in the Publication settings section.
If you use so-called "regular" forms, the multilingual form function creates 4 links, each of which you can create in a different language. You can do the formatting on the Language versions page.

Create your own subtitles for the language versions. Create your own descriptions and confirmation messages for different language versions.
Enable JSON feed. Create a feed that can be supported in other systems. Open the collected data into code format.
Use encryption for JSON Feed.
JSON secret key: Locks the feed, which can be opened with a password.
Enable captcha. Create an image certificate for the form to ensure that the person filling out the form is a human and not a bot. Note that if it is possible to log in at the fair doors, the captcha must be removed when logging in at the doors begins.
Default language you don't have to choose.
Page divisions. In the personnel group view, you create page divisions every thousand people. Handy especially if you have several thousand people in a personnel group. Note that in very large events, where we are talking about managing 10,000+ people, the browser may slow down due to the amount of data. Page separation speeds up updating the page. When page separation is on, you should remember to perform a person search on all the pages you want, because the search only looks for a person on the open page.
Generate automatic code. Create your own code for people. Suitable, for example, for personalized messages or raffle codes.
Documents
Here you can create documents, such as contracts or certificates. They can be sent to people via the Actions menu, using the Send Document function.
Export data
Here you can download the data collected from the group of people to your computer as a CSV file. Remember to choose the correct separator (a good rule of thumb is: comma = PC / semicolon = Mac).
Publishing settings
The Publish form button creates forms for the event and their own registration links. There are 4 different types of links and they are explained below. Feel free to publish the form and test all links before sharing them. There is no better way to check the customer path than by trying it yourself.

Public url. Normal registration. If you want exhibitors, partners, etc. to register themselves, this should be done through this link. After registration, the software will send a trade fair pass to the registered email for printing. After registration, the person/organization's information will appear on the personnel group, from where they can be managed.
Check-in desk url. At the event, on-site login by the customer themselves, in which case the ticket/access pass is printed directly on the trade fair's printer. The form resets at the end and is ready for the next login. Remember to remove the captcha from the form publishing settings before logging in, if you have turned it on.
Invite url. Exhibitors can invite the customers they want.
When a new exhibitor is created, each has their own unique invitation code (picture above). If you add an exhibitor yourself, you will not remove this code from the form. This code connects the exhibitor and the invitee. NOTE: Instructions for inviting and using the invite code can be found at the end of the instructions.

Links that are not specifically named

Registrations made through these links above will appear in the list of the fair's personal form with a yellow ball icon. They must be approved separately, or select automatic approval from the functions. These links are good for registrations by social media influencers, media, school groups, etc., in which case the registration will be approved or rejected separately by the producer. They will be sent a pass/passcard by email via the Let's Go menu.
Registrations received through these links must be sent manually to the Lippu.fi system via the Send Lippu.fi button. This way, information about people is updated and the information remains up-to-date.

Other functions of publishing settings
Limit the number of applications (max): If you want to limit the number of incoming applications, you can set a maximum number of applications. In this case, the form will close automatically after the maximum number of people filling the form you set is reached.
Allow entry of additional contacts: Allows multiple people to register on the same form. This feature is usually not needed, as the exhibitor can add all relevant people/stand employees in the NA panel. However, if you use regular links, this feature is useful for media representatives, for example, when registering, as both a reporter and a photographer can be registered at the same time. For further instructions, see the link.
Follow-up. This feature allows the applicant to complete the form after submitting the application. This feature is a good standard for forms. For further instructions, see the link.
Note: Post-filling is not as essential in the trade fair organizer's GEST, as the exhibitor has their own exhibitor portal where they can edit their information, add employees or invite guests. More on this at the end.
Send a confirmation message via emailThe system will send a confirmation message to the email address provided in the form after submitting the form.
Send a confirmation message to additional contacts via email. The system sends a confirmation message to the additional contacts indicated on the form after sending the form. This is suitable for non-exhibitors and invited guests.
Accept automatically. The system automatically approves every person who has sent an application, so approval does not have to be done manually.
The form automatically returns to the beginning. A new form opens after the previous submission.
Activate the customer invitation card. Affects actions in the exhibitor panel. Select this if you allow the exhibitor to invite their customers and any guests they want to the event.
Hide Exhibitor Cards tab. Affects actions in the exhibitor panel. If you have partners who are allowed to invite people to the event, but you do not want to give permission to add people with an exhibitor profile, select this. For example, a partner wants to invite their employees and customers to your event, they pay a certain amount for each invite. A good tool for limiting the rights of different groups.
ID card page sizeYou can specify the size at which the ID card/badge will be printed.
Features of the top bar
Layout of the form
Here you can customize the visual appearance of the registration form. Create texts, badges, and add logos and banners. You can record instructions for each step of the registration path. You can also create confirmation messages that are sent to the registrant after registration.

You can name the form and write a description for it. The name and description will show on the form. In the description, you can provide more detailed information and instructions for filling it out. The text can be formatted if desired and links or images can be attached to it.

If you have enabled the entry of additional contacts in the publication settings, you can also write a message at this point, which will appear on the next page of the form when completing the additional contact information. You can also write a text that will be visible to the person after sending the form. Note Exhibitors can add employees and guests through the exhibitor portal.
Entering additional contacts works for example for presenters, performers, etc. who do not have their own portal for adding people.
You can also add a banner to the header of the form. The recommended file format is .jpg and a width of at least approx. 1000 pixels. You can also upload the company logo to the footer.
Lippu.fi badge-In this section you can create your desired badge for exhibitors. If you need help with this, please contact us at info@gest.fi.

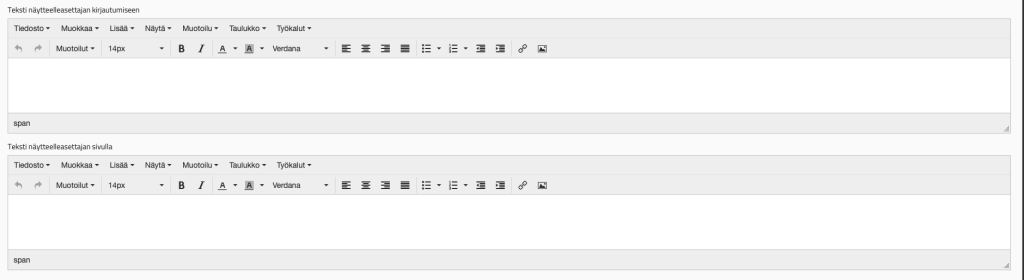
Write instructions to the exhibitor
Text for exhibitor login: instructions on how to log in.
Text on the exhibitor's page: instructions on how to work on the pages.
Confirmation message
If you wish, you can also format the confirmation message that the system will automatically send to the registrant's email address after submitting the form. Select the email address from which the confirmation message will be sent and the name that will appear in the sender field. Finally, you can format the message title and content.
If the person does not register themselves, but you add the exhibitors to the system, you can manually send a message from GEST to inform them of the upcoming event and provide more detailed instructions.

When the visual look is to your liking, you can proceed to define the publication settings yourself and publish the finished form.
The form can be placed as a link to the event's own website or by embedding it using inframe technology.
Copy to email
This feature sends a copy of the registrations to the e-mail addresses of your choice. The feature is convenient when you want to follow the status of registrations in real time.

If you want a notification on every new registration, you can send a copy to of these to your e-mail. First, define the recipients of the copy. If there are several addresses, separate them with commas. Then enter the heading of the message, recipient, sender and content of the message. If you want to see the information entered on the form as well, copy %formcontent% into the message field. This link will be replaced by the information of the person having completed the form.
the customer invitation card
You can create a ready-made template for invitations to different stakeholders. This way, both exhibitors and people invited by corporate guests, for example, receive an invitation that is tailored to the event. You can create a template Publishing settingsfunction.
Open the customer invitation cardpage and use the editor to create the template you want. You can add images, banners and texts.

Attach part or all of the following placeholders to the invitation: %invitation title% %invitation text% %inviter% %inviting company% partment number% %invitation code% %ticket link% %ticket amount%. The placeholders are replaced by the invitee's and the inviter's information, depending on the purpose. The invitation is sent from the exhibitor portal. Invitations cannot be formatted, other than apart from the inviter, invitee and title levels.
You can use the image above as an example. Placeholders can be found at the bottom of the editing tool. However, a simple invitation only needs the following: %invitation title% %invitation text% %inviter% %inviting company% %invitation code%
5. Language versions
In GEST, you can create 4 different language versions of the same form. With a multilingual form, each respondent can fill out the form in their chosen language, but all information can be processed collectively within the same group of people. Different language versions have their own links, so if you want to allow people to fill out the form in different languages, display the links you want.
Note! Public url, Check-in desk url and Invite url links Forms can only be created in two different languages, Finnish and English.
6. Rights & Log
On the Rights tab You can make changes to the visibility of a person group. You can specify which users have the right to see and manage the person group's information and make changes to the settings.

The Log tab saves all changes made within the person group. You can also restore deleted persons from there.

From there, you can see when the action was performed (time stamp), who performed the action (user) and which action it was (event).
7. Collections and data aggregation
See here for instructions on production tools and how to connect collected data to them.
8. Check-in
At trade fairs, exhibitors, stakeholders, etc. usually log in. However, here you can see the possibilities of the function for presenters, performers, etc.
9 Statistics
From the statistics section, you can see the number of people in a personnel group, how many have printed their own access cards and how many have arrived at the event. You can see the check-in times and how many visitors you have had during the day. You will also receive a summary of your (sold) products, if you have had any.
10. Exhibitor Portal – Instructions
Sending credentials to the exhibitors
Exhibitors will be sent their IDs to their own exhibitor portal via the Actions menu, under Send email.
Select the message template you created in advance, to which you have attached the following items (you can copy and paste them directly from here if you wish):
URL: 1TP3Recipient.loginurl%
USER ID: your email address (where you received your login information)
PASSWORD: %recipient.password%
Placeholders %recipient.xxxx% will create a unique password for each recipient in the message, through which they can access their own Exhibitor portal. When logging in, you must use the email address with which the person registered. The URL will create a link to the page for logging in. So do not write anything in their place, but add them as they are in the message.
When logging in, the subject of the message and the title of the email can be, for example: Exhibitor IDs for "Fair Name" fair in 2024.
It is recommended to send the invitation and link to the portal to only one employee/contact person of the company (exhibitor).. The person is the company's contact person and has a star next to him in the person list. He is the person who adds other employees to the department and thus links them to the same company. It is important that all employees are added through his account. It is also recommended that invitations to all invited guests are also sent through his account. This way, all invited guests can be found behind the same invitation code.
However, it is also possible to send invitations to other employees in the department. When the company's official contact person (star) has added the employees in the department to the system, they will be given their own invitation code. After this, they can be sent links to log in to their own account. Especially if employees do not want to share their own contacts, this is a good way to let them manage their own invited guests. If the company's invited guests are billed and all employees in the department have received their own IDs, the invitation codes of all people should be found out to find out who has been invited.
Note If someone other than the company contact person (starred) adds employees to the department, no code will be generated for them, and the guests they invite cannot be determined. This means that the people they invite will not be found and will not be billed.
Proposal. If possible, the organization should register for the fair, for example with an info address, so that other employees of the organization can also use the panel and invite their contacts. This way, all information is saved on the organization's website.
Exhibitor login to the exhibitor panel. The exhibitor's contact person will receive a link to the address in their email and log in with the credentials they received.

Note! The password changes every time the email is sent to the contact person again. So if the person can't log in, first check that it's the latest password that has been sent to the person.
Contact details tab
From here, the exhibitor, as the contact person for the event, can directly print out their exhibitor card or send it to their email. If any information needs to be changed and is no longer allowed to be edited, they can notify the trade fair office, which will allow the trade fair organization to edit the information internally, or they can also create a new exhibitor card for themselves on the “Exhibitor Cards” tab.

Exhibitor cards tab
From here, the organization's contact person can add information about the people working at the stand and print exhibitor cards for them. The cards can also be sent by email.
Other persons and access rights – tab
If access to the exhibition area wants to be given to only specific groups of people, the exhibitor can also add other people to the event apart from their own exhibitor organization and invited guests. For example, during the construction period, the exhibitor can add their own subcontractors and other stakeholders to the event, who are only granted access to the event at a certain time. A specific access right (time/gate) has been defined in advance for these groups of people, to which the exhibitor can add people.
The trade fair organization determines whether there is a need for adding access rights to external people as stated above, and creates the necessary personnel group forms and credentials with the desired access rights. It may also be necessary to determine which gates at the area can be used with this right. Especially if the trade fair lasts a long time, driving to and entering the area should be concentrated at certain times and at certain gates. This increases security and enables strong access control.
The above mentioned functionality is enabled in GEST, in the Publishing Settings of the trade fair exhibitors form. Click on the Additional people tab.

After this, on the Add Personnel Groups page, you can choose which personnel groups the exhibitor can add people to.

In the Limit field, you can specify the capacity, i.e. how many people a company can add per group. The limit is the same for everyone.
The selected groups of people will appear in the drop-down menu on the exhibitor panel. The information is filled in per group of people, i.e. the same person's information must be entered in each required group of people (access right). The information to be collected is determined by the trade fair organization, but we recommend keeping the form short.

Sending invitations to guests via the exhibitor portal
Send invitations tab
The exhibitor can send invitations either to a larger group at once or to one person who can share multiple invitations out.

1. Sending multiple invitations to one person – NEW FEATURE
You can now send multiple invitations to one person at once from the exhibitor panel. The maximum number of invitations that can be sent at once is 20. If you want to send more invitations, repeat the operation. The invitations can all be found on one message, meaning they do not fill up the recipient's email.
Enter the information on the invitation as shown in the picture.

It is recommended to include ready-made text templates and headings, especially if the exhibitors are bad at writing them down. If you do not include at least headings in the message, sending will fail and the program will show an error sign. This often raises questions about why the program is not working. Ready-made texts make this easier and at the same time, you can instruct the exhibitors' customers and include, for example, a link to your fair's website, its schedule, etc.
Default texts are created in GEST, in the Administration > Publication settings > Customer invitation cards of the person group to be invited. So who is the invitation sent to? Usually the invitation is sent to the invited guest/trade fair visitors. Specify the desired titles and default message on the Customer Invitation Card page for that group of people, which the exhibitor can use in their own invitation. If the exhibitor wants to edit the text or write their own, they can do so.
The Invitations and Inviting Company fields are filled in by the exhibitor themselves.

From the drop-down menu, the invitee can specify how many invitations they want to send.
![]()
2. Sending an invitation to multiple people at the same time

If you want to send invitations to more than one person at a time, select 'Send to invitation list (csv)'. People can be added in three different ways. NOTE! Required fields are always 1)First name 2)Last name 3)Email address, and 4) Company.
1. List each invitee separately
You can add people by entering each person's information on their own line. When you have added everyone, press the Continue button.

2. Load the template (csv), through adding your customers' contact information under the headings in the place designated for them. The file is saved in csv format.
Upload file through choose a filethrough the point.
After this, you should check that the data was imported correctly, that the emails and names are in the correct fields. If there are any spelling errors or incorrect characters in the data, you can edit them. Then press on'Continue'
3. Paste from clipboard
If you have a list on a spreadsheet but don't want to import it, you can also paste the data from the sheet. Select the desired columns and copy. Then select the action, i.e. paste from spreadsheet.

When importing a .csv file or copying from a spreadsheet, the software will ask you for additional information. So, if the first row of data you imported was a header, you can remove it by clicking on the point marked on the image below. After this, specify the value of the data to be imported, again as shown in the image.

After saving, the information will appear on the fields. If you need to make any further changes, you can edit the fields. When all the information is correct, press CONTINUE.

Problem situations:
- If special characters appear on the fields or the letters are not displayed correctly, make sure that the file is saved in an UTF-8 format. You can import the data again, or edit the data on the columns.
- If there are empty lines in the name list, they must be deleted one by one or the csv file must be imported again. The “Delete all” button will empty the page. Remember to check before re-importing that the csv file has header fields according to the template, that there are no empty lines, and that all is saved in an UTF-8 format.
- Separators: comma = PC / colon = Mac. When uploading a .csv table, remember to choose the correct separator. There are exceptions, so try both options if necessary.
- The system can send approximately 1000 invitations at a time. If you are sending more invitations, make several shorter lists from the file and send the invitation lists in several batches.
- Depending on the spreadsheet, some will have guest codes in one column (possibly columns e, f, g, h, etc.). Please remove this specific column before uploading it to GEST.
Send invitations invitation template texts
In the next window you can enter invitation texts.
If you have created a default text, it will appear here. Please note that the default text for the invitation must be created through the exhibitor management function (Customer invitation card), but the outgoing invitation is created from the visitors' (the group of people to whom the message is sent) management function (Customer invitation card).

If you want to send the invitation in English, select the option from the Select language drop-down menu. Don't forget to create the layout of the form in English from the Publication settings, too Layout of the form EN.

Mandatory fields on the form are Email subject and The title of the invitation. If the exhibitor does not fill them in, after pressing the Send button, Error 500 appears on the software. In this case, the information of the invitee goes into GEST, but the invitation message does not go to the invitee.
Finally, you can add the text of the invitation, the inviter and the inviting company. Press "Send" when everything is ready. The invitation will be sent to the customer's email, from where they can print it.
Following up on invitations
"Invited" tab
Here, the exhibitor can see to whom the electronic invitation has been sent and who has printed it. There you can send the invitation again if necessary, if the customer has not reacted to it. You'll also be able to see who is at the event and after the event, you'll see all the people who arrived to the event. From the Excel button, you can export all the information for your use.
11. Exhibitor app credentials
If you would like a mobile app for your own trade fairs that allows exhibitors to keep track of leads, visitors to their stand, etc., please contact us. This is a great addition to your service, especially at professional trade fairs.
The same credentials through which the exhibitor uses to access the exhibitor portal also works for the Exhibitor app.
Contact person credentials (main IDs)
Through the app, the company's contact person can
- quickly create, edit, and send exhibitor cards to employees at their stand
- sees all the guests who are at the event (whose QR code has been scanned with the app)
- see the people invited to the event and whether they have arrived
During the event, all the exhibitor's employees can use the contact person's credentials, i.e. the so-called main IDs. Therefore
- all leads accumulate on the same platform, which
- everyone can see who has visited the department and
- if there have been any notes taken on specific leads
Other employees' own credentials
If the company wants each person working at the stand to have their own credentials for the application, they are sent the IDs of the exhibitor portal, i.e. send an email via the Let's go menu and select a ready-made message template with
URL: 1TP3Recipient.loginurl%
USER ID: your email address
PASSWORD: %recipient.password%
then choose the employees whom the contact person wants to have their own credentials, then press on send.
In the employee view
- there is no list of invitees, as they have not been linked to this person
- only the leads collected by them are visible
- they can create exhibitor cards for the department employees and email those to the employees in question
This option works when employees collect their own leads.
Download from here to get more familiar with the trade fair side of GEST.