Personnel group control panel
The personnel group's control panel has many different functions, which you can use to, for example, customize the personnel group's settings, import information into the system, and publish the form you created.

- Settings: Here you can find all the basic settings of the person group.
- Payment: Here you can manage payment transactions and select products for your customers to purchase.
- Documents: Here you can create documents such as contracts, certificates or info packages.
- Export data: Here you can download data collected from a group of people to your computer as a CSV file.
- Publishing settings: Here you can for example publish a form.
- Form fields: Here you can edit the form.
- Language versions: Here you can create a form for three (3) more languages.
- Rights: Here you can manage permissions to view and edit a form or collection.
- Log: Here you can see the most recent edits made in a group of people.
Personnel group settings
The basic settings of the personnel group are managed through the Settings tab.
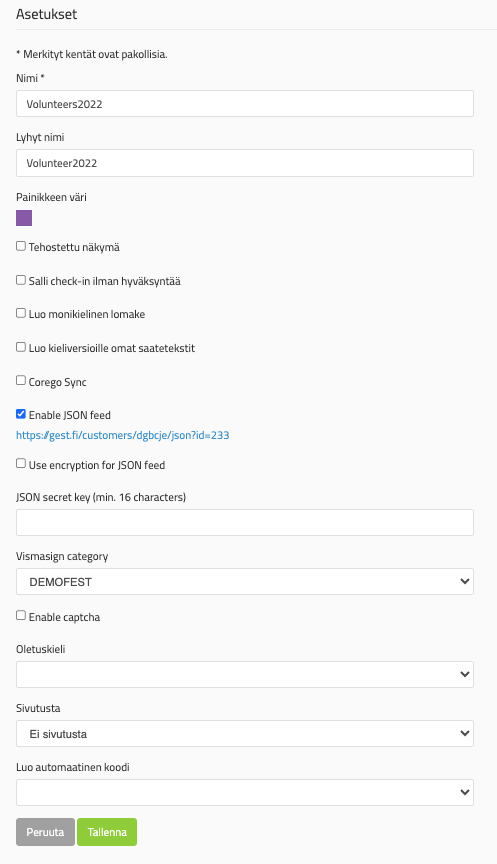
Settings functions
Name: The official name of the form, which is also visible to outsiders.
Short name: The short name is shown in the top panel of GEST.
Button color: You can change the button color later.
Enhanced view: The People Management home page will become more streamlined. This option will eliminate features and speed up data updates.
Allow check-in without approval: By default, in the check-in view, you can only check in approved people. By checking this box, you can also check in people with other statuses. Also allows non-approved people to check in in the check-in view.
Create a multilingual form: Create language options for the form.
Create your own descriptions for language versions: Create your own accompanying texts and confirmation messages for different language versions. So if you create a form in several different languages, it is good to create instructions in that language for each language version to make the user experience as smooth as possible.
Enable a JSON feed: Create a feed that can be read in other systems, such as WordPress. Export the collected data to code format.
Use Encryption for JSON Feed: The selection encrypts the data and locks the input, which can be opened with a password.
JSON secret key: The password you choose to open the JSON feed.
Payment
On the Payment tab, you specify which products can be purchased through the form and how to pay. Payments can be made directly through the form, via a payment link sent to your email or via invoice. More instructions can be found on the page: Payment features.
Documents
The Documents tab allows you to create and send various documents, such as contracts, business cards, and certificates. Documents can utilize information collected from forms using placeholders, which automatically generates content for each recipient. For more instructions, see: Document tool.
Export data
The Export data function allows you to download a group of people's data from GEST in CSV format. You can limit the exported data based on, for example, approval, check-in, tags or products, and choose a file separator that is appropriate for your device. For more instructions, see: Import and export of personal data.
Publishing settings
The Publishing Settings tab allows you to manage the publishing, appearance, and post-fill settings of the form. For example, you can open or close the form, limit the number of applications, and edit confirmation messages, texts, and banners. For more instructions, see: Publishing settings.
Form fields
The Form Fields tab is where you build and edit form fields. You can define field titles, instructions, mandatory fields, and visibility, as well as change the order of the fields. For more instructions, see: Form creation.
Language versions
The Language Versions tab allows you to create and manage different language versions of the same form. Each language version will have its own link, but all responses will be collected in the same person group. For more instructions, see: Language versions.
Rights
The Permissions tab lets you control which users have access to that form and its data. You can hide a group of people from other users by selecting Hide the group from other users and determine Allow access - those people who have the right to use the form. Remember to also add your own user to the rights so that the form remains visible to you as well.
Log
The Logs tab provides a summary of changes to the form's personal information and who made the changes. The log also allows you to restore deleted people back to the person group.