Importing and exporting personal data from the platform
Personal data can be loaded into GEST from outside the system. For example, if you have compiled the contact information of invited guests in a separate file, you can easily import all people into the system at once instead of having people add themselves using a form or entering each person's information individually.
Data in GEST can also be exported.
Importing data into GEST
You can import files via the Import tab on the right side of the person group view.

To import data into GEST, you must first download a spreadsheet template that shows the form fields. Complete the spreadsheet and upload it back to GEST, where the system will import the person's data into the person group for management.
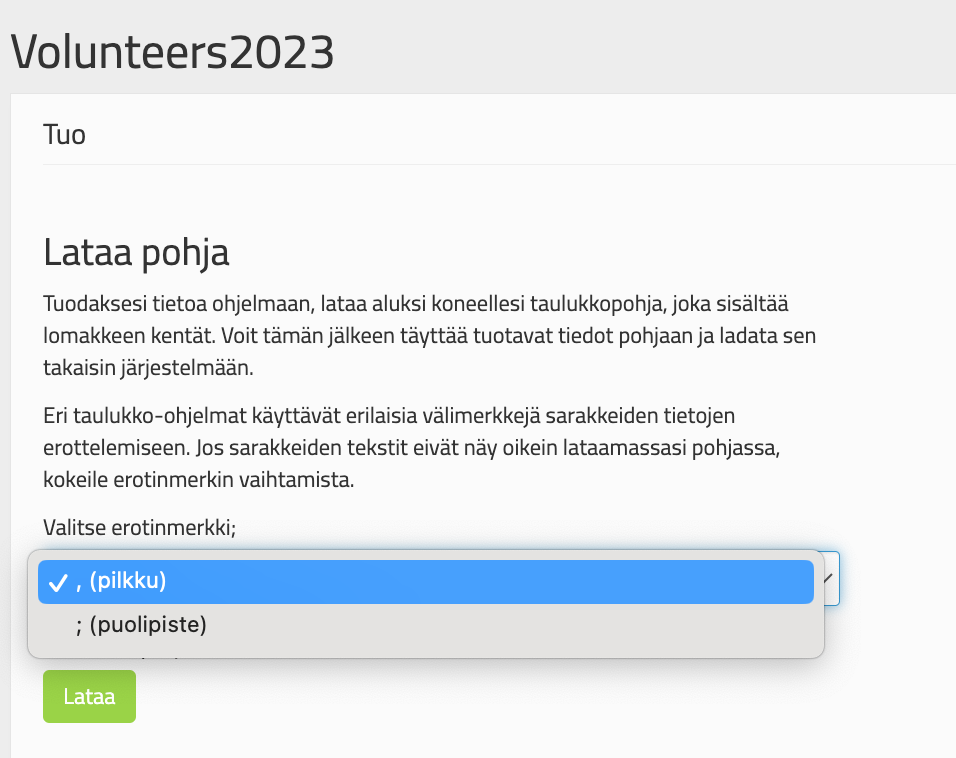
Downloading a CSV table to your computer
- Select separator (good rule: comma = PC/semicolon = Mac).
- Download the base
- Open file in your preferred spreadsheet program.
- Complete the necessary information for the table.
- Save completed table for your computer In CSV format. The CSV format is essential, as the table can import data in that format. For example, if you save the table in Excel format, the data will not be imported into the system.
Note
- Different spreadsheet programs use different separator characters.
- If the table looks wrong after filling it in, try changing the separator character. The separator character affects how the data is arranged in the table columns (e.g. in a box or in its own columns).
- Different spreadsheet programs behave differently with respect to character sets.
- Try different character sets if there is something wrong with the spelling. The character set you choose will affect how the hyphens look and whether the text is readable.
Once you have completed the necessary information in the table and downloaded it to your computer, you can bring it back into the system.
Uploading a completed CSV table to GEST
- Select the file you created (Choose file)
- Select the table separator (comma = PC/semicolon = Mac). Use the same one you used to download the spreadsheet.
- Select character set (we recommend: Unicode UTF-8)
- Press Preview.
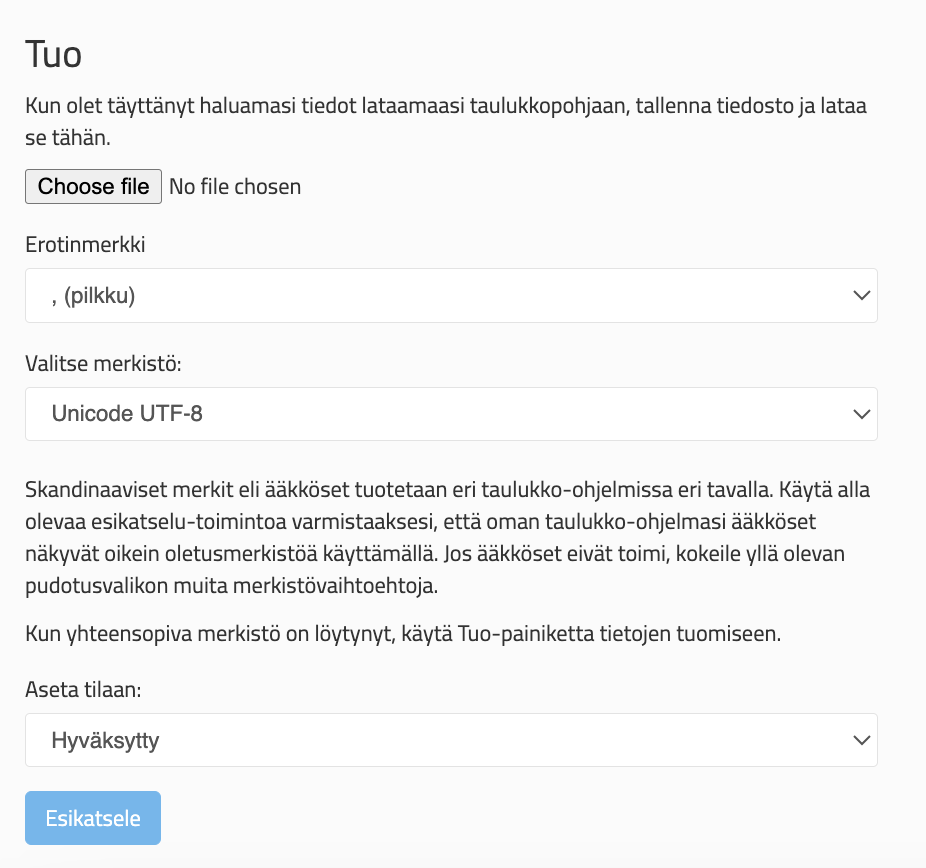
If everything is okay
- Configure personal data status, i.e. select either Approved or Waiting status from the drop-down menu. With this status, the person will be moved to a person group.
- That list To GEST, press the Import button.
Tip
- You don't have to fill in all the fields in the table. Import the information you have and update the rest later if necessary. Delete the other columns from the table.
- If the form has multiple choice, drop-down menu or date fields, make sure you fill in the fields exactly as they appear in the answer options. Otherwise, the information will not be transferred to GEST.
Exporting data from GEST
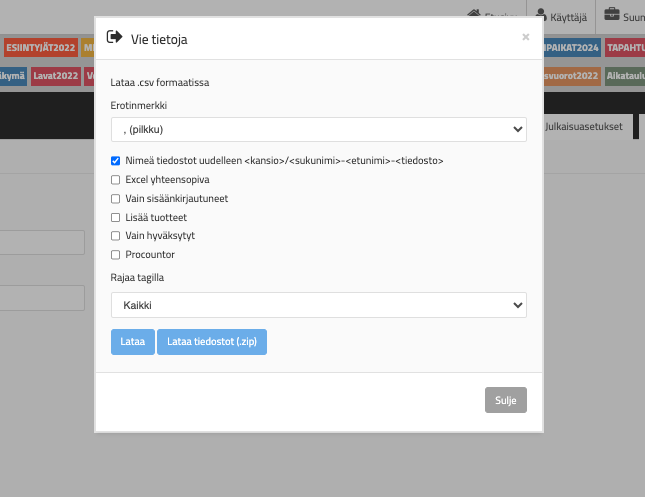
You can export person information from GEST using Export data function. You can access the function by clicking on the person form Management through.
- Again, choose the appropriate separator for your computer.
- After that, choose the limitations of the information from the list below - i.e. what, how and whose information you want to show.
Export Data options
- Rename files: Names the file after the first and last name of the person who uploaded it.
- Excel compatibility: Use if you have Excel.
- Only logged in users: Import information only from those who have checked in.
- More products: Adds the products assigned to members of a person group to a table. The function creates a separate column in the table for each product in the system and shows which products have been assigned to the people. If there are a lot of products, the table will also have a lot of columns.
- Only approved: Only approved individuals will be included in the listing.
- Procountor: Create a CSV suitable for Procountor This function allows you to export billing information to Procountor. To use this function, your organization must have a Procountor account and the form must be optimized for collecting billing information.
- Limit by tag: Here you can select one limiting attribute. The tags in the list are those that you have created for this group of people.
Once you have selected the separator and delimiters, press Download.
If people have been asked to add files, such as tax cards, you will get their links to the list. Only those who have the right to the relevant personal form can export personnel lists. Personal information is sensitive, so every user must be careful when handling it.
The most important thing when transferring data in and out of GEST is to make sure that the separators (comma, semicolon) and character sets are correct for your machine. Spreadsheet programs are different, which is a good thing to take into account.
Remember, the file must be downloaded to your computer in CSV format so you can upload it back to GEST.
 English
  Finnish