WordPress plugin
With the GEST WordPress plugin, you can import GEST schedules, as well as performer, vendor, or other operator information, directly to your own website. The plugin retrieves the information directly from your own GEST. Once the plugin is installed and configured, the information is automatically updated in WordPress.
If you would like to enable the add-on, please contact us at info@gest.fi.
Instructions for using the add-on
Forms in WordPress plugin
Create your chosen one in GEST personal forms or Group/Band collections, whose information you want to import to the website. Create all the fields on the form that you want to display on the website, for example:
- Name
- Introductory text
- Picture
- Social media links
- Websites
- Visiting hours
- Menu
The form may also have fields whose information is not published on the website at all. You can find instructions on linking fields to the add-on below.
You can also use Admin only fields on the form to collect internal information. Admin only fields are not visible on the public form, but the producer can fill them in the person group management view. For example, the fields can be used to collect information about themes, colors, or other additional settings that can be set in the WordPress plugin.
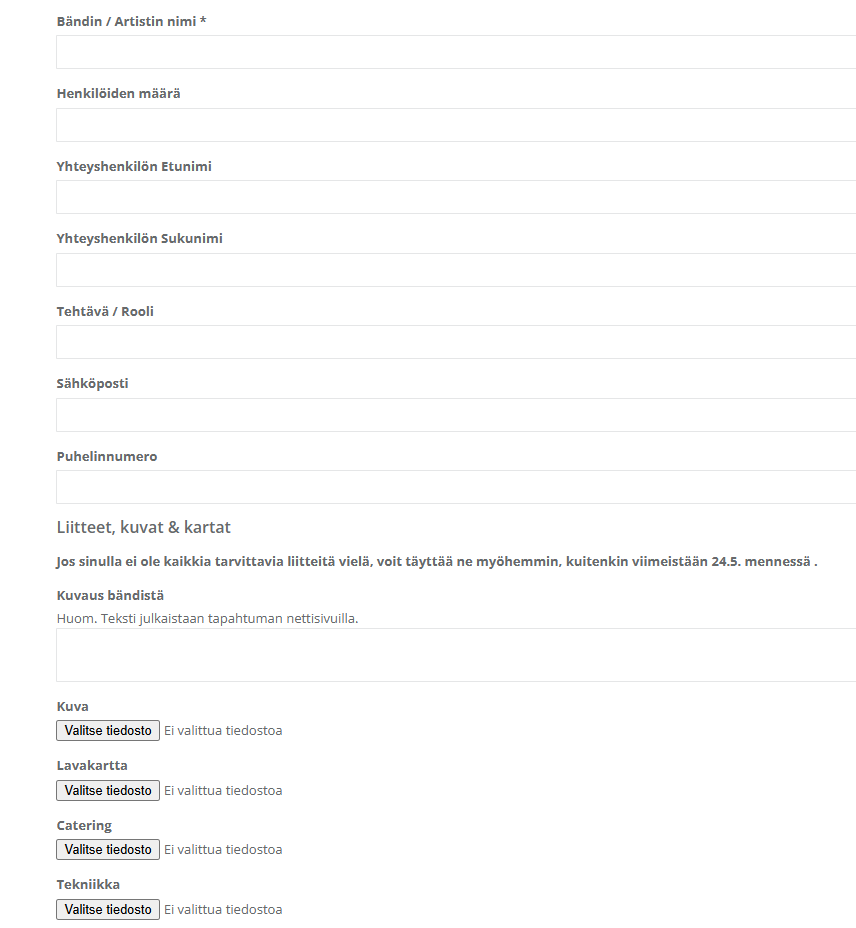
JSON Feed in forms
To link the form to the add-on, you need to enable JSON Feed in its management. You can find the settings for this at the top of the form under Possession.
- Open form
- Go To manage
- Put a check mark in the box. Enable JSON feed
- Put a check mark in the box. Use encryption for JSON feed
- Set a password of your choice in JSON secret key (min. 16 characters)
- Use the same password for every form and schedule.
Setting a password and using encryption is important to prevent personal data from being viewed from the outside via the JSON feed.

Accepting people
WordPress only shows approved people, groups, or actors. A person/group is approved when there is a green circle in front of them.

Schedules in the WordPress plugin
Create a schedule as usual in GEST. Instructions for creating an event schedule can be found here. through here. Add slots to the schedule and assign performers, people, or other actors to them.
Only approved schedules are displayed. In WordPress. You can edit the status of the schedule by clicking on the pencil icon at the top of the calendar view.
Note: Currently, it is only possible to link one active schedule collection to the WordPress plugin at a time.

Schedule slot release
Each schedule slot has its own status. The options are Draft or Public. In WordPress, they are visible only approved schedule Public -status slots.
You can also color-code the schedule and arrange slots with Draft status, for example, in gray and published slots in color.
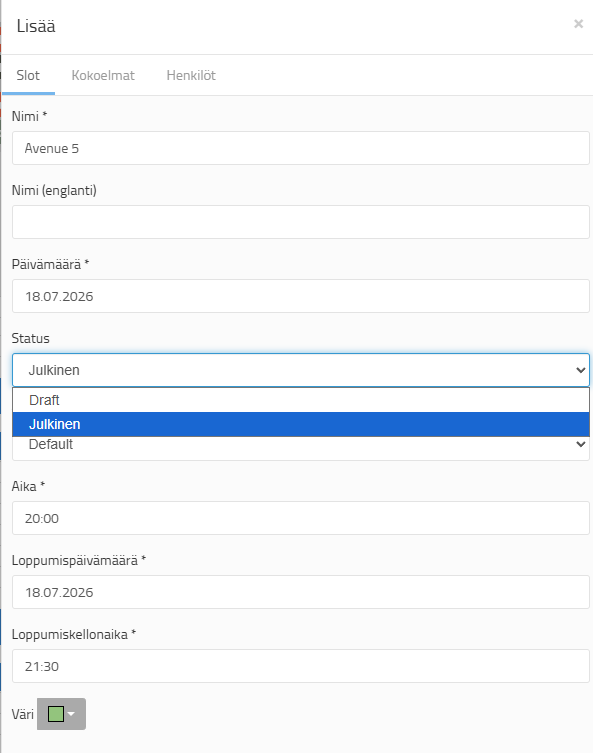
JSON Feed on schedule
In order to link the schedule to the add-on, you need to enable JSON Feed in its management. You can find the settings for this at the top of the schedule collection under Possession.
- Open schedule
- Go To manage
- Put a check mark in the box. Enable JSON feed
- Set a password of your choice in JSON secret key (min. 16 characters)
- Use the same password for every form and schedule
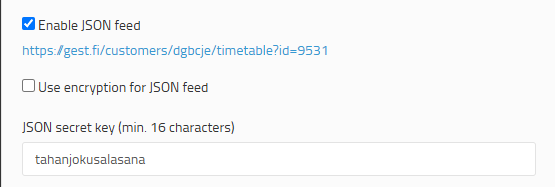
Linking GEST data to WordPress
Below you will find instructions for using the new GEST PRO add-on and the previous GEST add-on.
GEST PRO add-on (instructions will be updated)
Once the plugin is installed, it can be found in the WordPress sidebar.
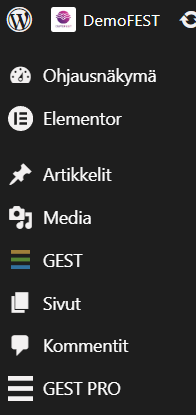
GEST PRO add-on settings
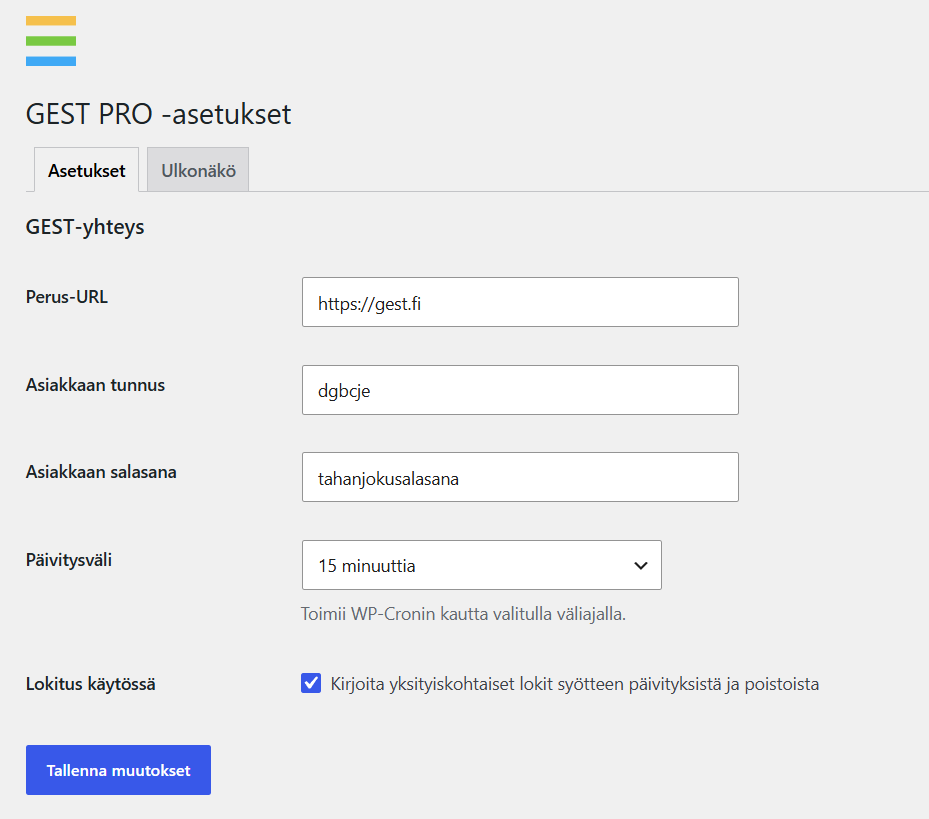
Base URL: https://gest.fi
Customer ID: The ID of the organization's GEST account. Found, for example, in the URL of each form. The ID is the same in all forms and is 6 letters long.

Customer password: Enter the same JSON secret key here that you defined in GEST. The secret key must be exactly the same in all schedules, Group/Band collections and forms whose data you want to link.
Update interval: How often you want WordPress to check for changes to the content. WordPress will automatically refresh the page at the interval you set.
Target types
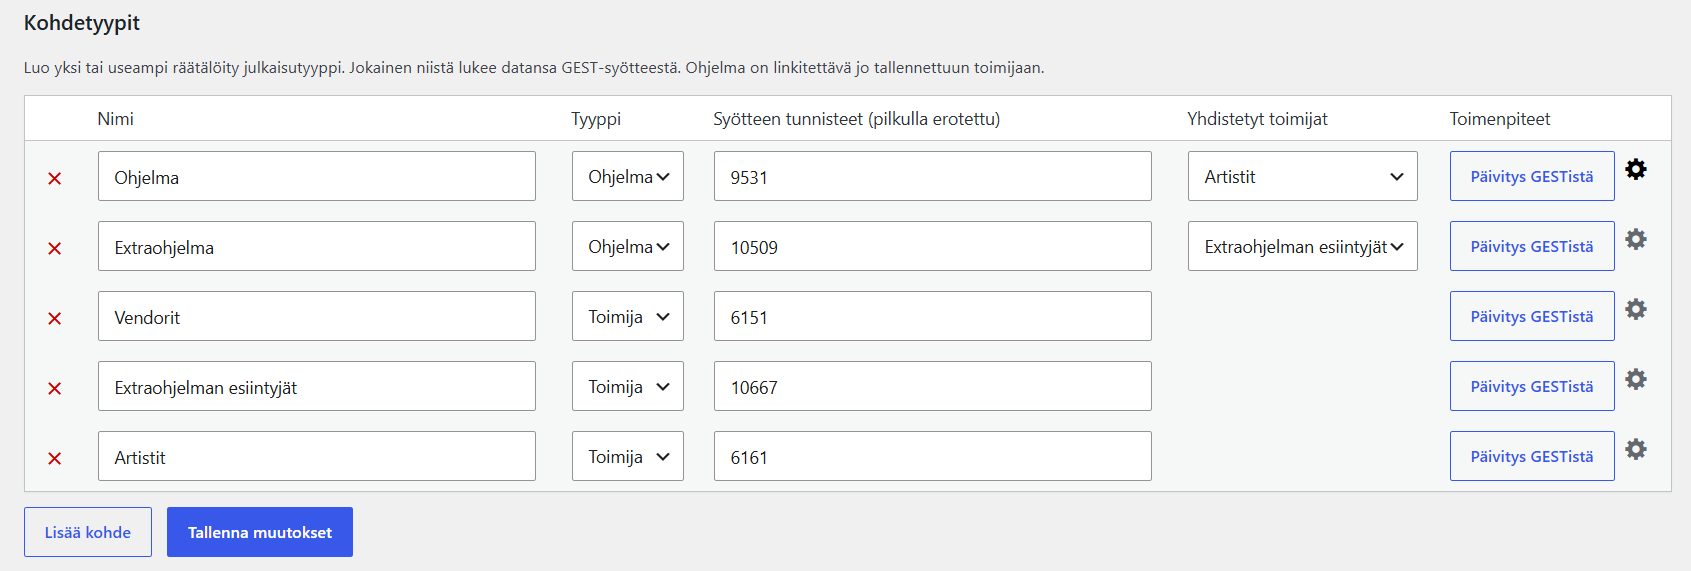
In this view, you link the forms and schedules you want from GEST to the plugin. Each item type creates its own Post Type page in WordPress, whose settings can be edited separately.

Name: In this text area, you name the content you are linking to. For example, artists, performers, schedule.
Type: In this menu, you specify whether the content you are linking to is a program (e.g. schedule) or an actor (e.g. artists, vendors, performers).
Feed tags: Add here the numbers of all forms, Group/Band collections, or schedules you want to link. The form number can be found at the end of the form's URL. If you are linking multiple forms, separate them with a comma.


Associated actors: Here you connect which actor (e.g. artists) is associated with that program schedule.
Measures: Update from GEST. From here you can manually update GEST content to WordPress.
Gear icon: By clicking here, you can further define what content you want to import from GEST to WordPress.
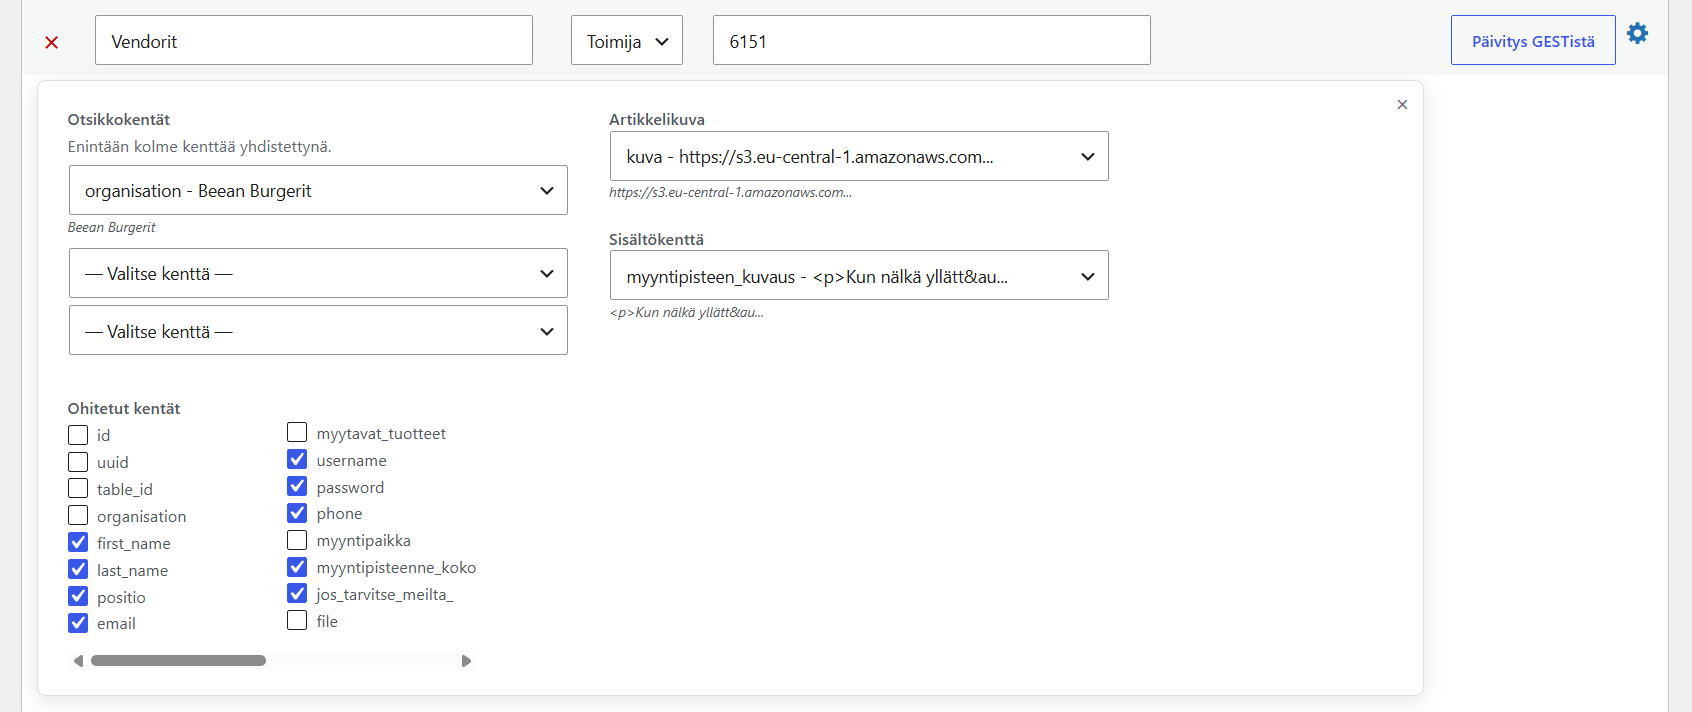
Header fields: Here you specify which form field will form the content title.
Article photo: Here you specify which field will be used to create the content (article) image.
Content field: Here you specify which field the content (article) text will be composed of.
Skipped fields: By clicking, you select the fields whose content is not displayed at all in WordPress.
Shortcodes
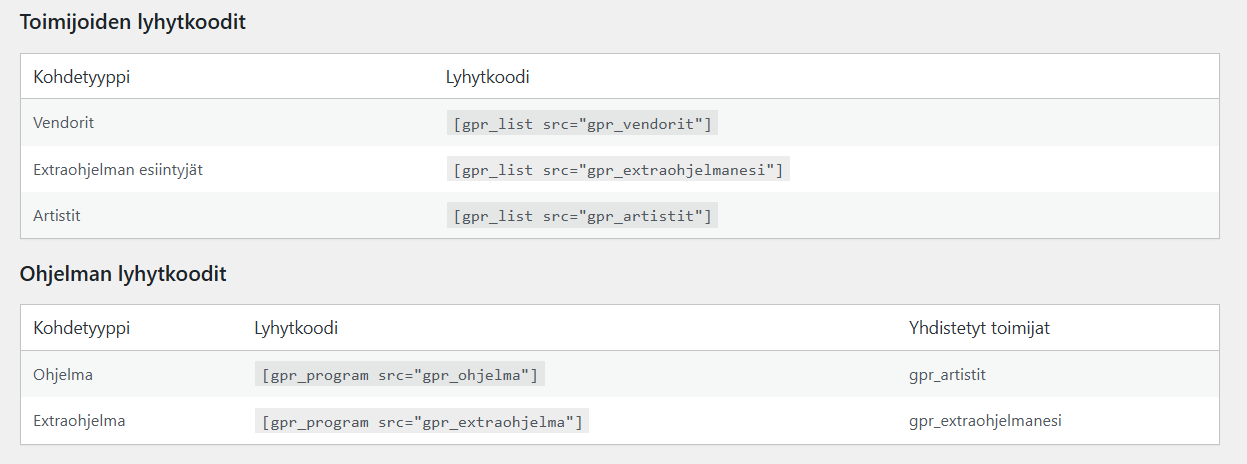
These shortcodes allow you to bring GEST content directly to your website. Each type of item you link to creates its own shortcode, which you can copy and paste into the WordPress text editor as is.
You can further customize each of your item types from the post types they are created from in the WordPress page menu.
Editing operators
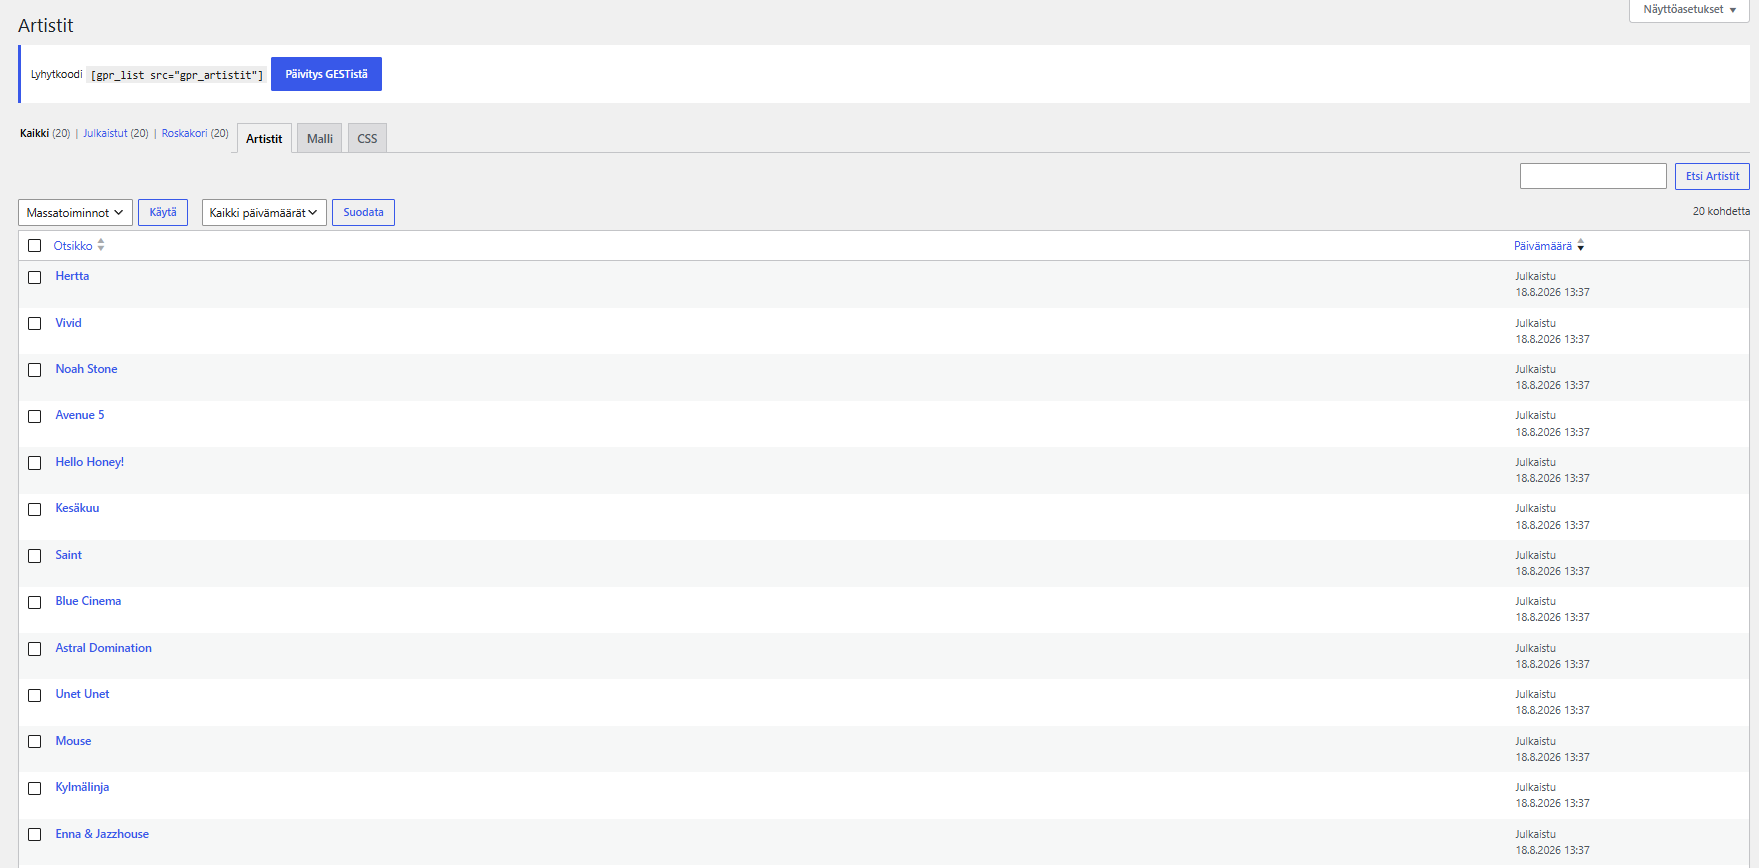
When you click on an operator's post type in the WordPress page menu, you will see all the articles of the operators on that form. The top edge Quid and CSS-menus allow you to further customize the appearance of the operator presentation. At the top of the page you will also see a shortcode that you can place on any page in WordPress. Using the shortcode, you can bring the operator listing to the page of your choice.
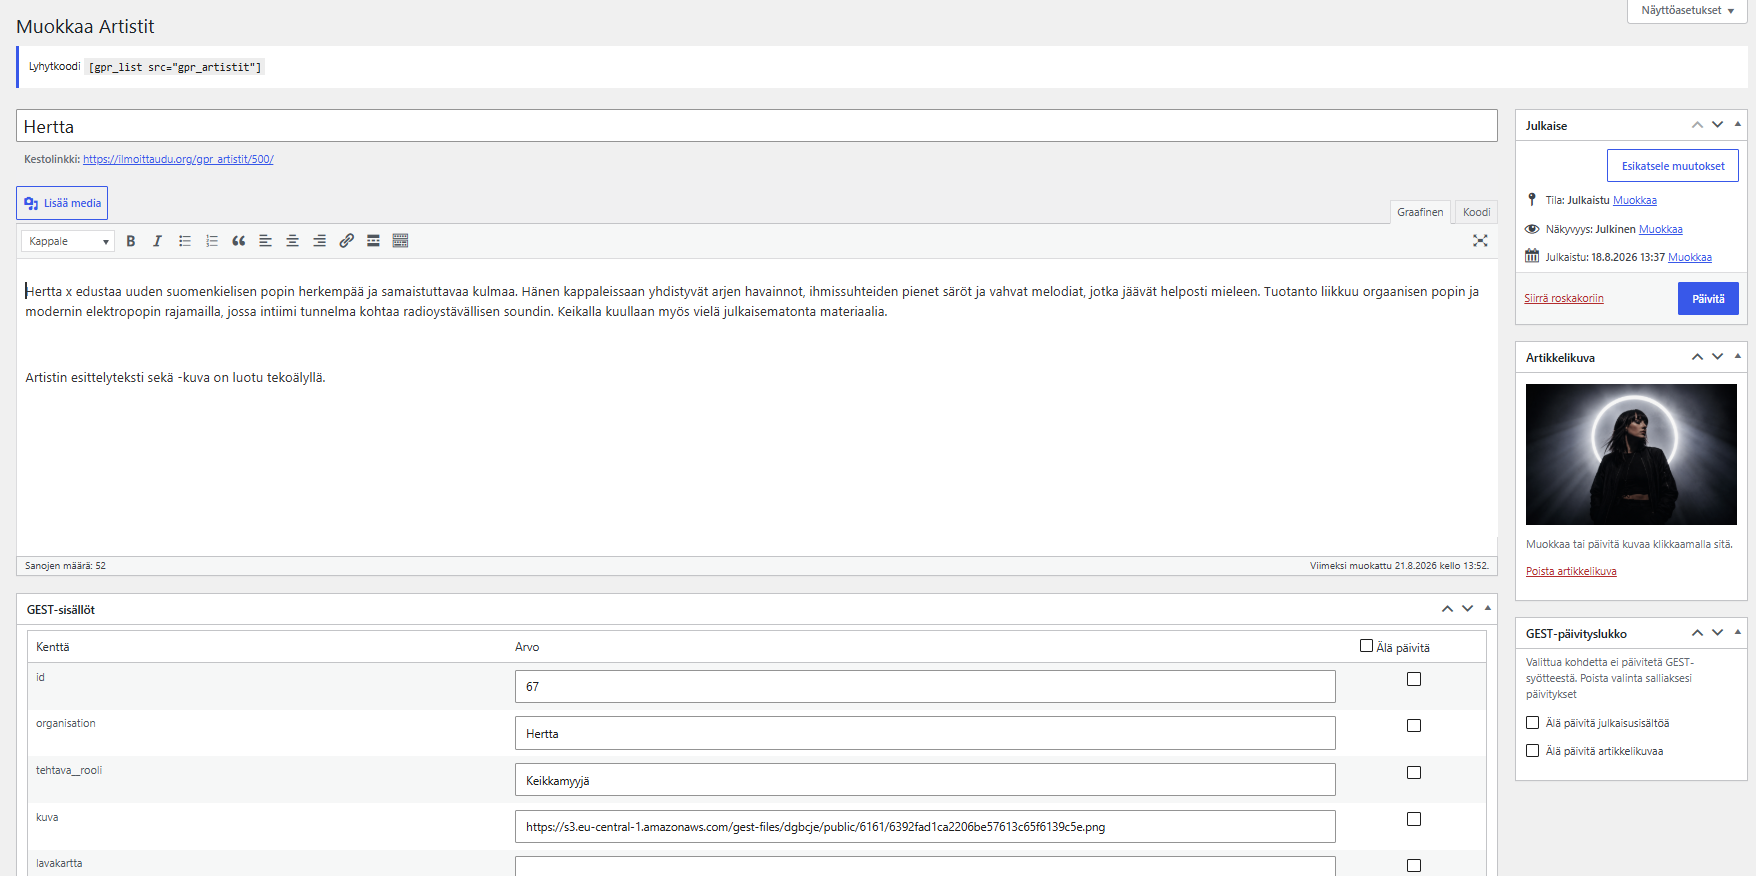
By clicking on the name of the operator, you can edit the text and image of that operator and see what information will be transferred from GEST to WordPress. The content displayed in the text editor is determined by default based on the content you have defined in the GEST PRO plugin settings under Item Types. By default, the image specified as the article image in the same settings is displayed as the operator's image.
You can edit the operator's presentation separately in the text editor. For example, you can attach images or text from outside GEST to the text. By clicking Do not update you specify which data you do not want to be updated directly from GEST.
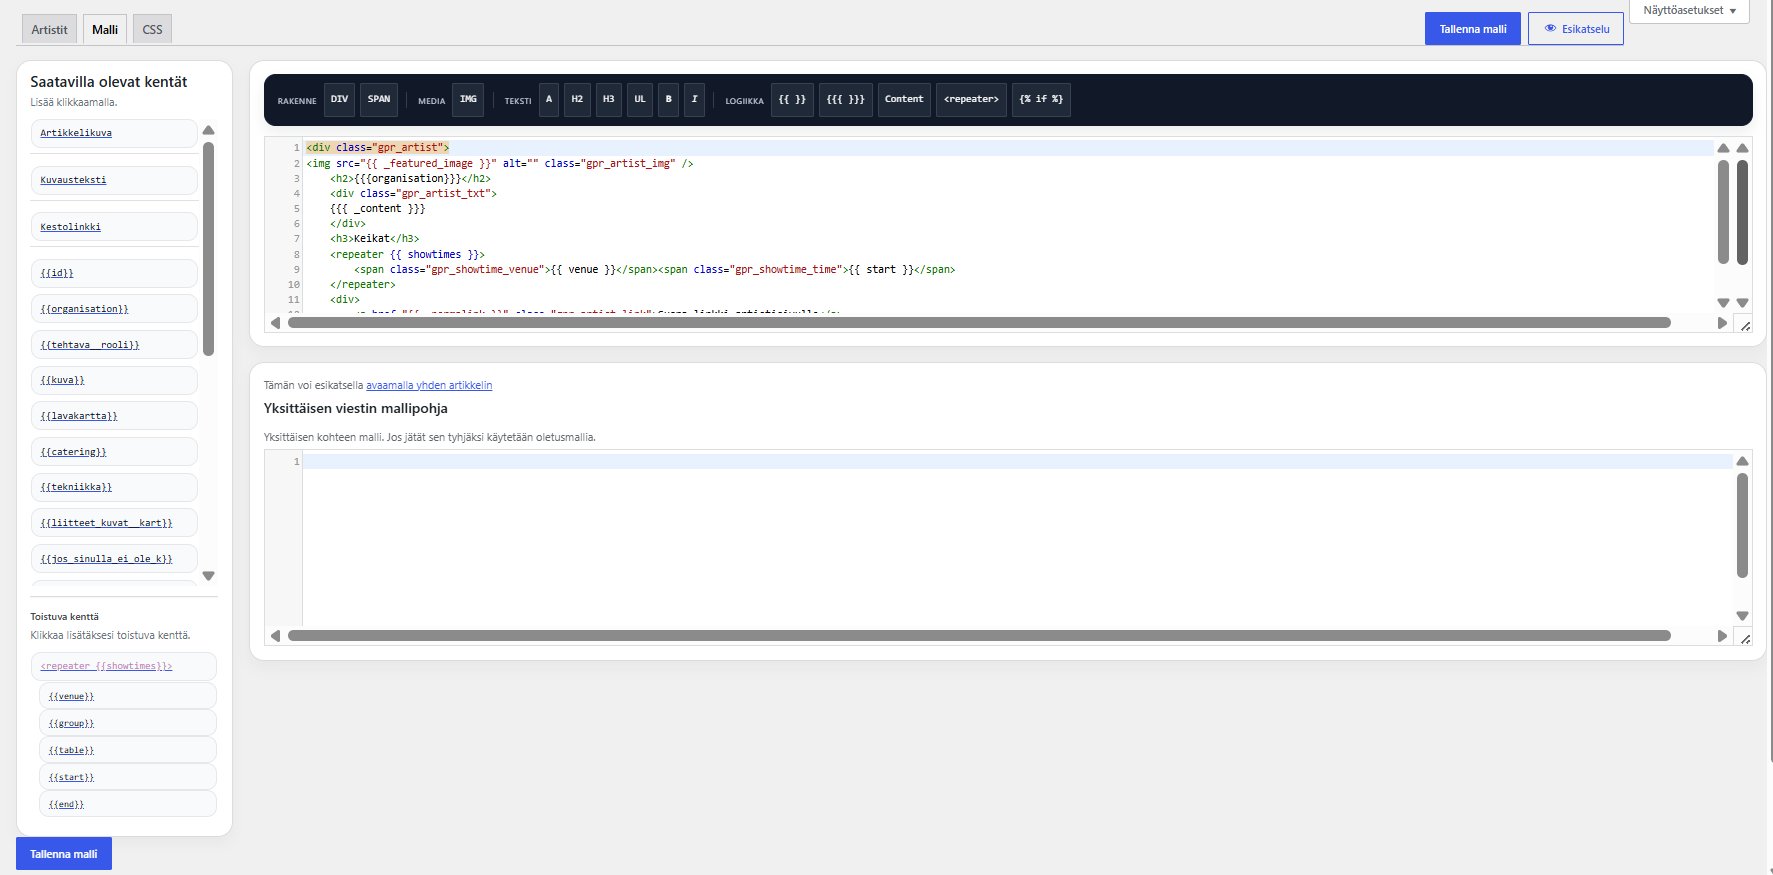
At the point Quid you define how the operator presentation is structured. You can drag the available fields from the menu on the left. In Single message template You can define what each actor's own article looks like.

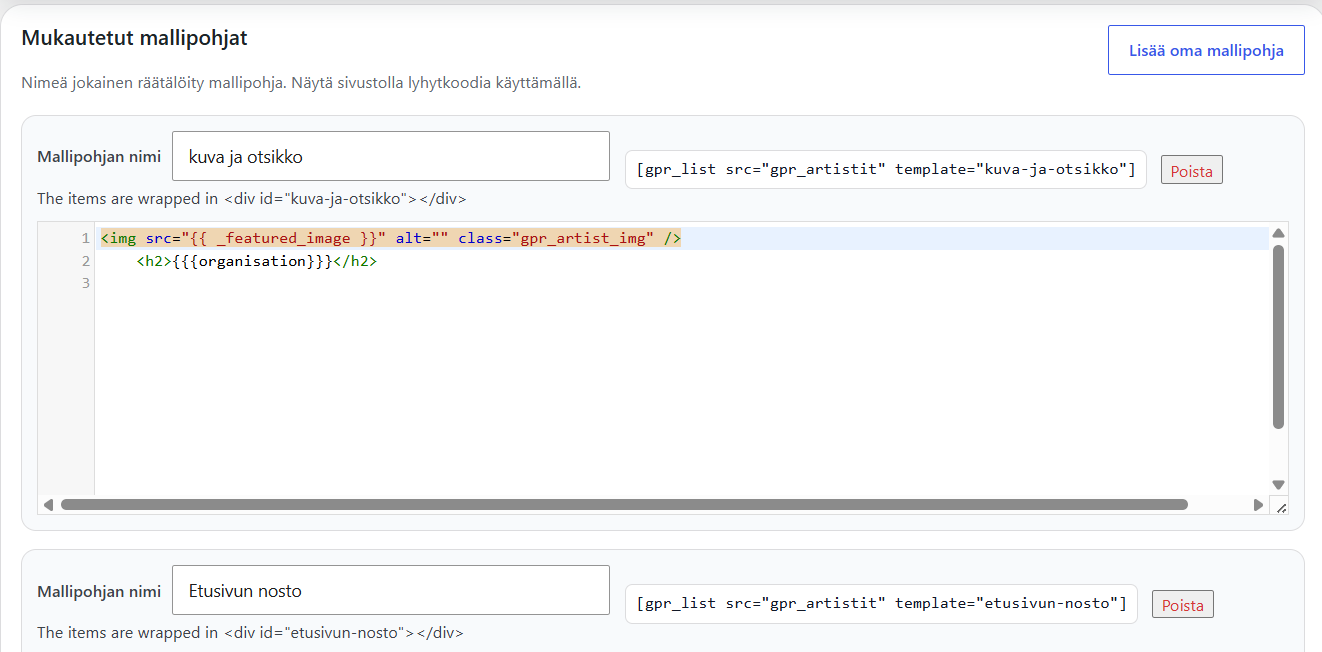
At the point Mukautetut mallipohjat voit luoda useita erilaisia mallipohjia eri käyttötarkoituksiin. Voit esimerkiksi luoda eri näköisiä nostoja tai listauksia, joiden sisältö muodostetaan automaattisesti kenttiin tallennettujen tietojen perusteella. Listaus voidaan muodostaa esimerkiksi sen mukaan, onko sisältö määritelty makeaksi tai suolaiseksi tai mihin genreen se kuuluu.
Jokaisesta mukautetusta mallipohjasta muodostuu oma shortcode. Voit kopioida shortcoden ja lisätä sen haluamallesi sivulle, jolloin kyseisen mallipohjan mukainen sisältö näytetään sivulla automaattisesti.
At the point CSS You define how the presentation of actors looks visually.
Editing a program
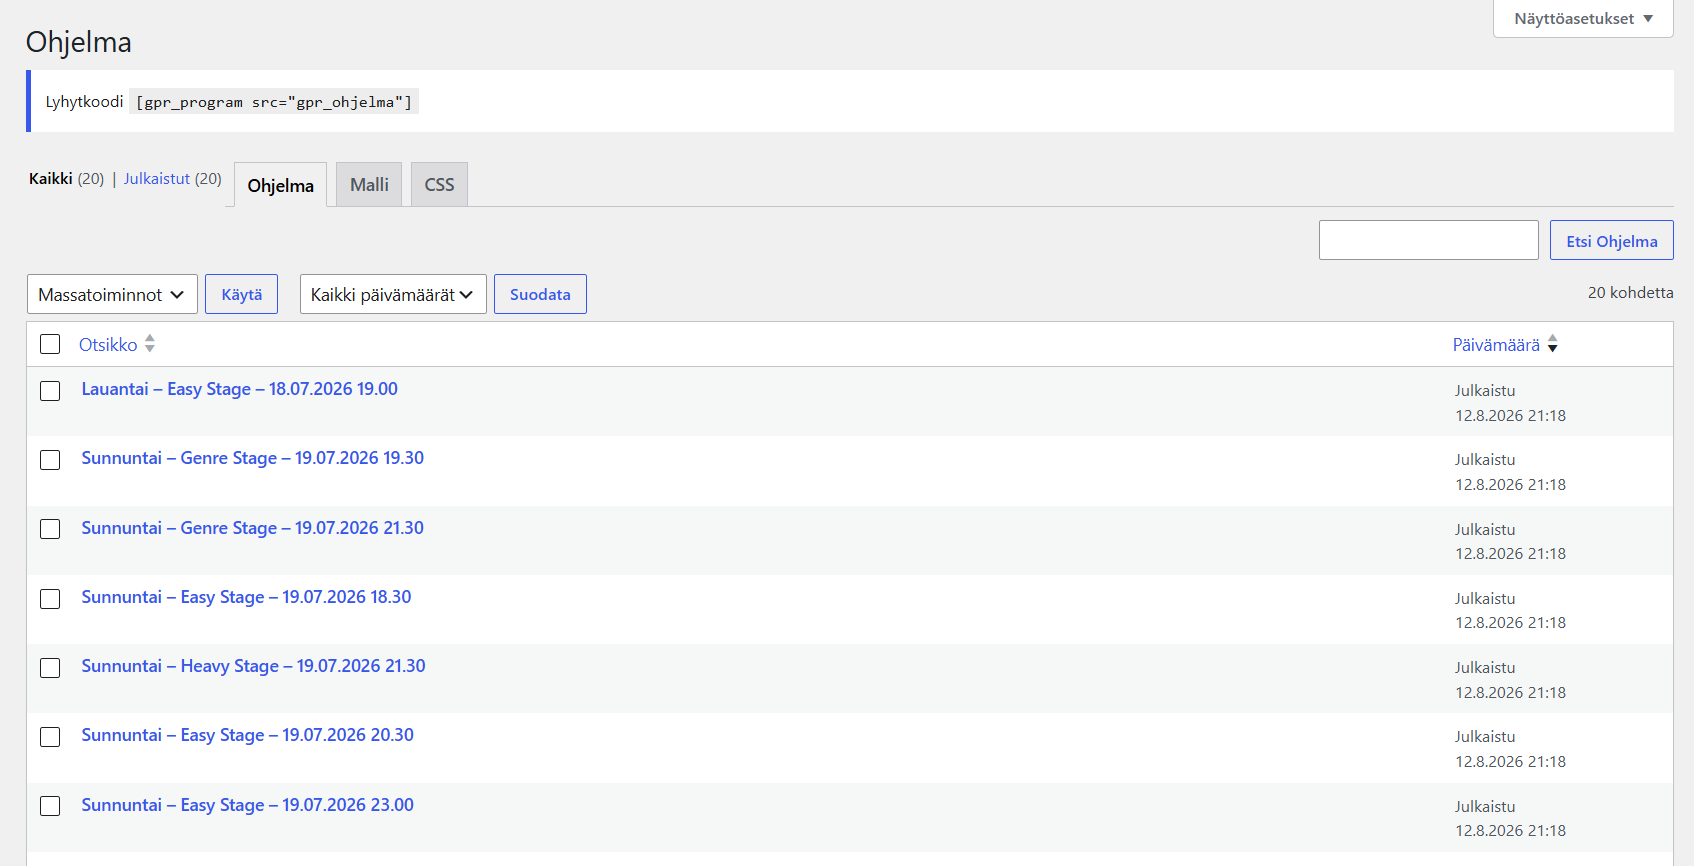
When you click on a program's post node in the WordPress side menu, you can see all the time slots in that schedule and their own articles. At the top Quid and CSSYou can further customize the appearance of the schedule from the menus. At the top of the page, you will also see a shortcode that you can place on any page in WordPress. The shortcode will bring the program to the page of your choice.
GEST add-on
Once the plugin is installed, it can be found in the WordPress sidebar.
GEST plugin settings

Customer ID: The ID of the organization's GEST account. Found, for example, in the URL of each form. The ID is the same in all forms and is 6 letters long.
Secret key: Enter the same JSON secret key here that you defined in GEST. The secret key must be exactly the same in all schedules, Group/Band collections and forms whose data you want to link.
Artists feed: Add here the numbers of all forms or Group/Band collections to be linked. The form number can be found at the end of the form URL. If you are linking multiple forms, separate them with a comma.
Program input: Add the schedule number here. The number can be found at the end of the schedule URL. This old add-on only allows you to link to one schedule at a time.
Image placeholder: Select an image from the WordPress media library for this. The image will be displayed if the performer or actor does not have their own image in GEST.
Program page: Optional. Specifies the page where the schedule will be displayed. You can specify the page here or with a shortcode placed separately on the page. The shortcodes can be found at the end of the GEST plugin.
Performer page: Optional. Specifies the page where the performers or actors' information is displayed. You can specify the page here or with a shortcode placed separately on the page. The shortcodes can be found at the end of the GEST plugin.
Linking input fields
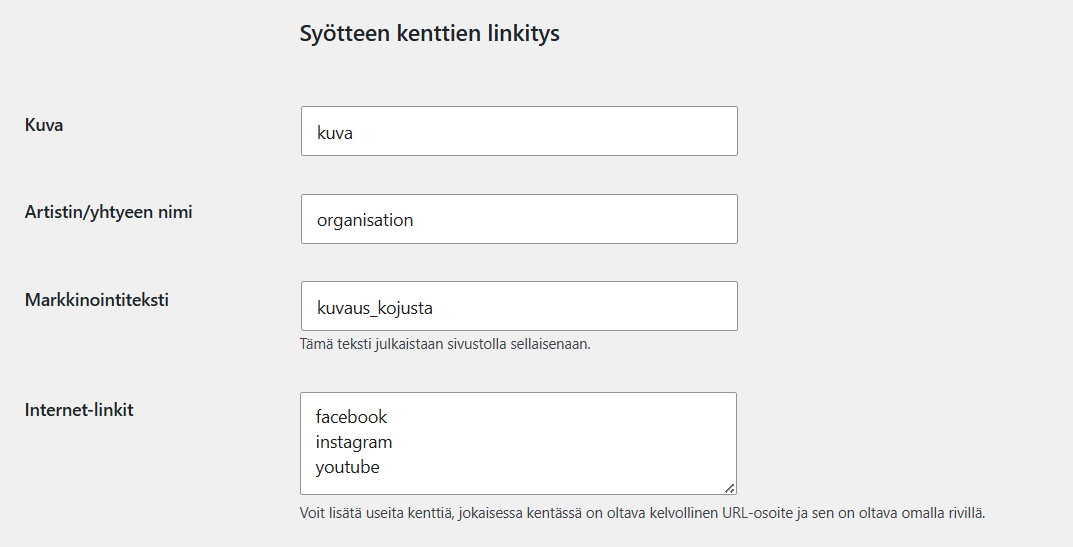
Picture: This is where you link the form field from which you want the presentation image to come.
Artist/band name: This is linked to the field containing the name of the actor being introduced, most often organisation.
Marketing text: This is where you link the field where you want the text to be used to introduce the operator.
Internet links: This is where you link the fields that contain the social media links of the actor being introduced, etc. that you want to be included in the presentation. If you link multiple form fields, place them in the text boxes one below the other.
Linking a single form
These text fields are linked to the fields in GEST forms whose data you want to import to the website. If you use only one form you can find the right fields by pressing the add-on button Retrieve field information from the Artist feed. The plugin automatically retrieves the field names. From these, you can extract the fields you want and paste their names into the correct text fields (image, artist name, marketing text, internet links).

Linking multiple forms
The plugin can only find field names from one form. If you are linking data from multiple forms to the plugin, it is easiest to find field names directly from the JSON feed:
- Temporarily disable JSON feed encryption.
- Open JSON feed link
- Click on ”Pretty code” or ”Pretty print”
- Search for field names (in the JSON feed you can also see what information has been added to the fields)
- Add the desired field names to the WordPress plugin.
- Turn encryption back on
Note: Always remember to turn JSON feed encryption back on.

Uploading images to WordPress
You can upload the images you collect in GEST to your WordPress media library by clicking on the plugin settings. Preload artist images.
Troubleshooting and data updates
If the information displayed in WordPress is not up to date, clear the plugin's cache. The plugin will then retrieve the latest information from GEST.
Also check that you have approved the desired people/groups and schedule, and set the published schedule slots to Public status.
 English
  Finnish