Event schedule
Venues/stages, bands and people can be added to the program schedule. For example, the programs for different stages of an event can be built within the same schedule collection. Once the schedule is in GEST, changes can be made easily from one place.
Please note that before compiling the program schedule, you must create your own collections of venues (venue base) and performers (group/band base) so that they can be included as part of the schedule.
If you have a WordPress website platform, you can also bring the schedule created in GEST to your website for your customers to see. More instructions on using the WordPress plugin can be found here. through here.
Creating a new schedule template
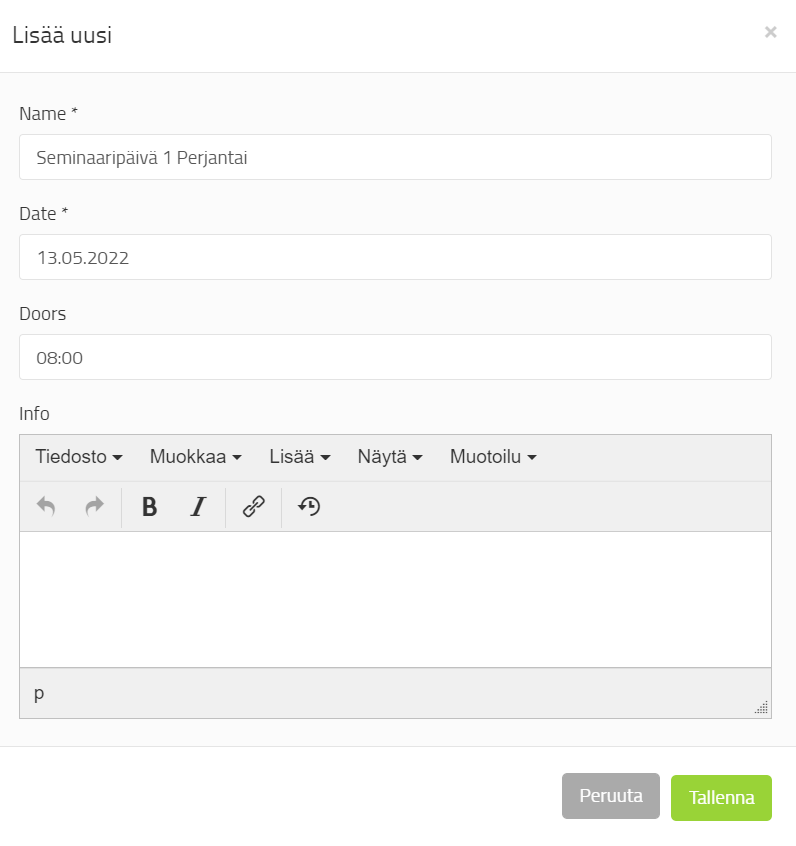
To create a program schedule, select from the drop-down menu Program schedules (Timetable). Name the base, for example Festival X 2025.
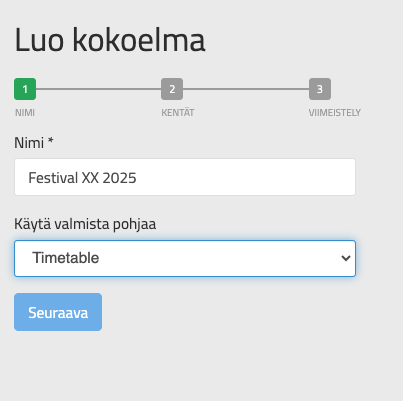
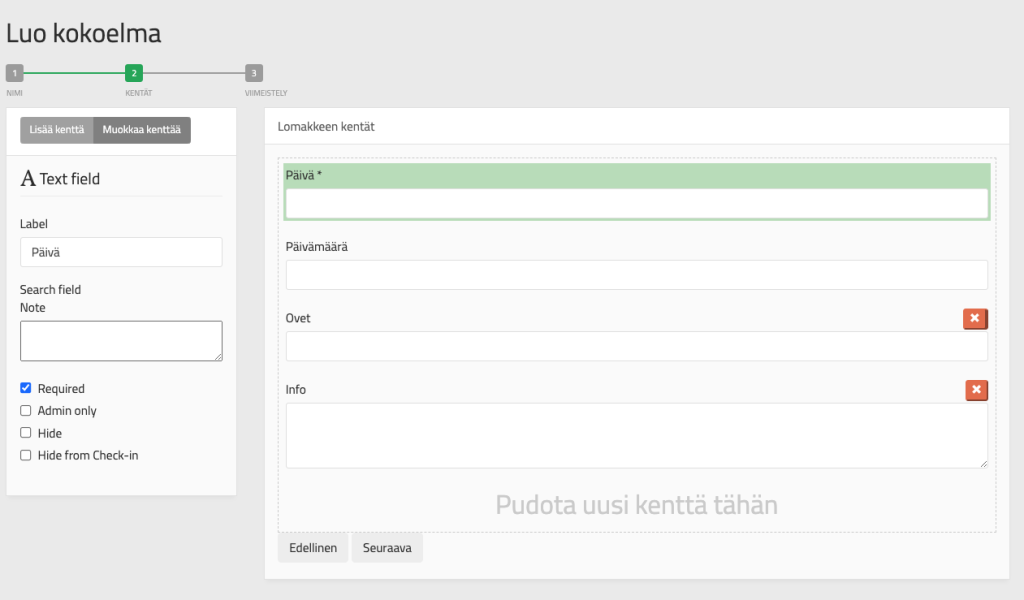
Then create a form. This form is not filled out by anyone outside, but rather by the producer. In the example form, the event date and time are recorded for each new schedule. Other information is additional information.
Press Next and Create.
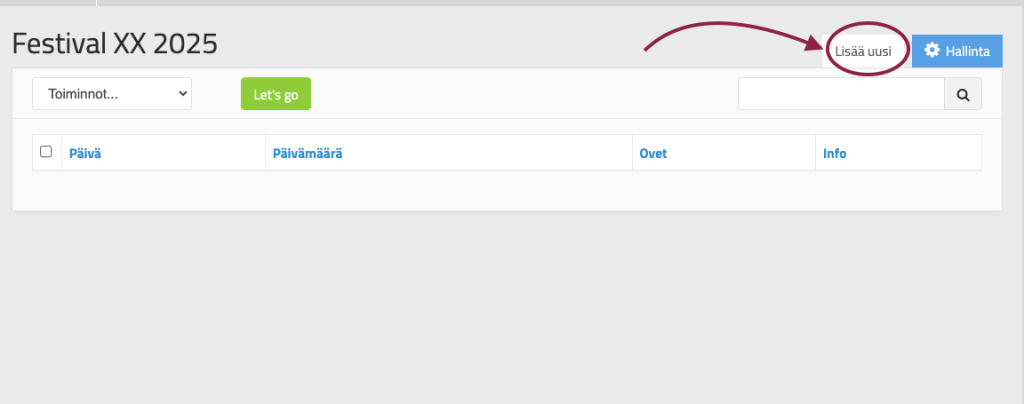
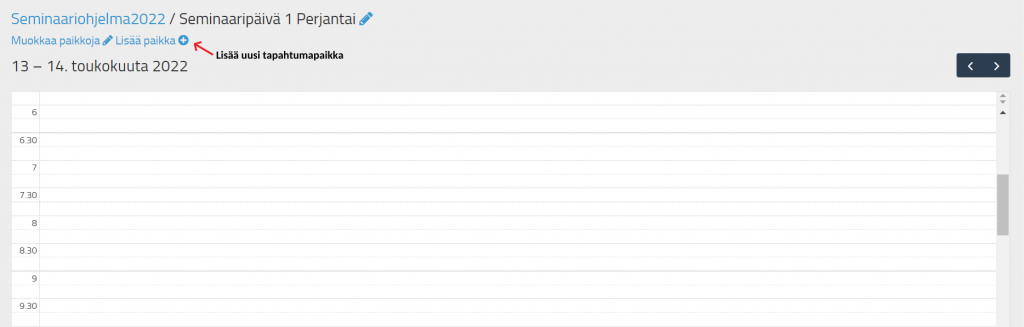
The schedule collection you created can be found in the production tools row. The home page is still empty. Only the form headings are visible. Now you can create schedules. Schedules are created per day.
Creating a new schedule
To create a schedule for a new day, press Add a new one.
Write down the name of the day and the date of the event. Write down any additional information you want. Create your own schedule for each day, i.e. Add a new one as many times as there are event days. They will appear as rows on the home page, just like the person information.
Finally, press Save.
Compiling a program schedule
Go to the schedule template by clicking on the name. The schedule template is empty at this point (picture below).
Building a program schedule consists of three easy steps:
- Adding venues to the program schedule (You must have a venue collection already created with all the stages/areas you need. Instructions for creating a collection can be found here. through here).
- Adding a program/slot under the event locations at the desired time.
- Connecting a performer to a slot.
- Connecting people to programs (optional)
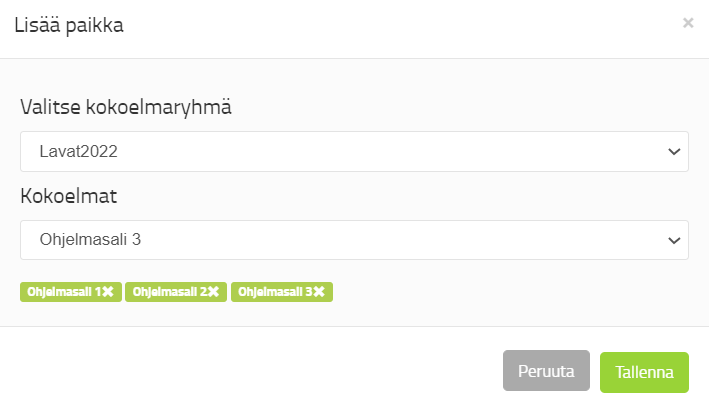
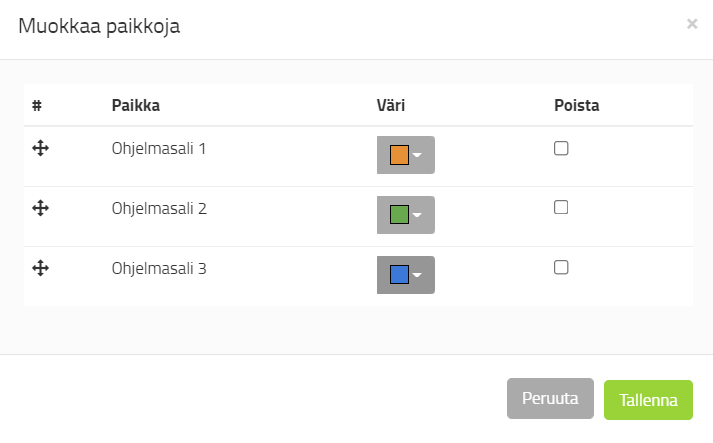
1. Adding venues to the program schedule
Event locations are added to the schedule template by clicking the button in the upper left corner. Add a place.
- First, select the right collection from the drop-down menu, where you can find the event locations you created in advance.
- Then, one by one, select the venues/stages/venues that you want to import into the schedule template and click Save.
The event locations appear at the top of the schedule template.
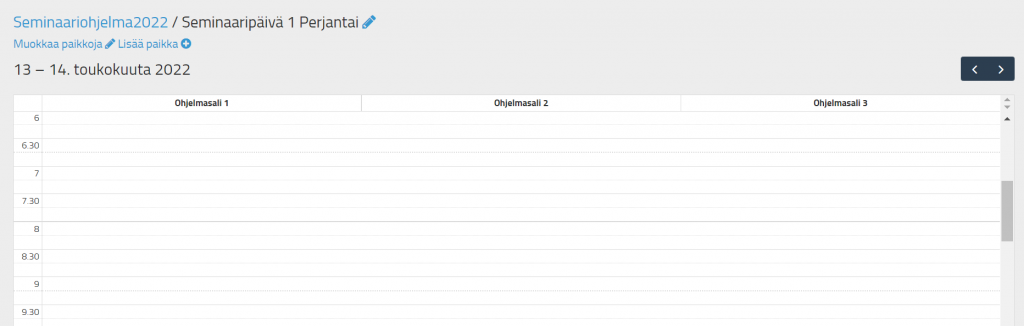
Edit locations tab to customize the view.
You can change the order of the venues by dragging the symbol on the left. The venue at the top will be displayed first in the schedule template. You can also assign a unique identification color to each venue. If necessary, you can also remove stages from the view.
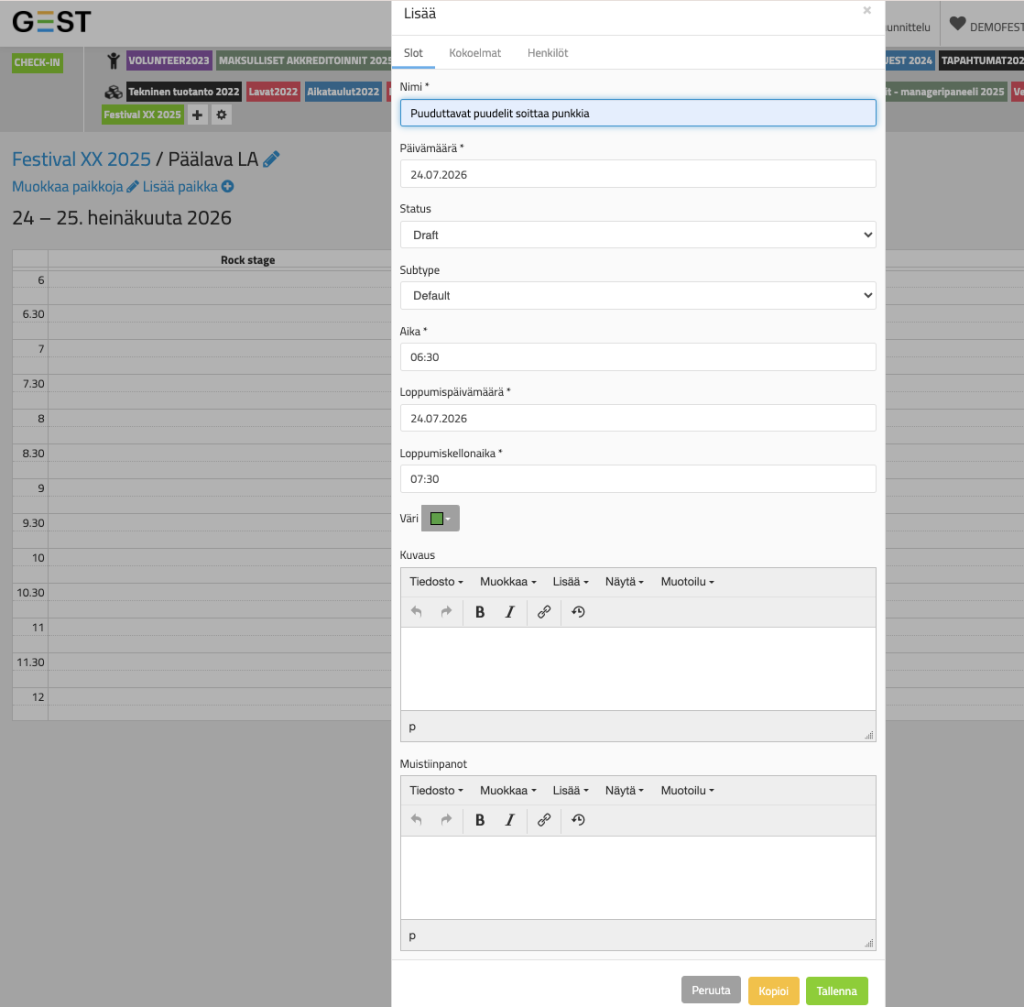
2. Supplementing program information
Click on the time next to the location to add the desired program/performers.
Add information.
- Name the program, for example after the band's name or theme.
- Set a time for the program and assign it its own identification color.
- If you have linked the program schedule to your website, for example, you can set the program status. If the status is Public, the program schedule will also be updated on the website immediately after you save the information. If the status is Draft, it will not be updated on the website after saving. The status of each event must be edited separately. So if the slot does not appear on the website or in the app, check the status.
If you do not add information about the band or speaker, for example, press Save.
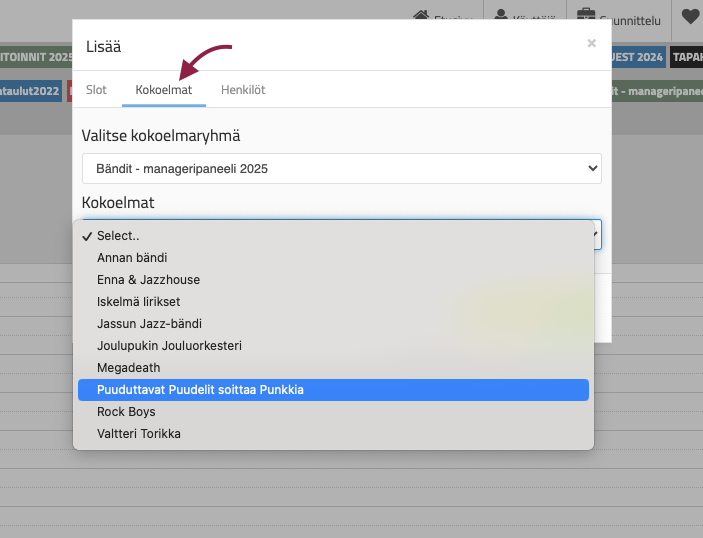
3. Adding performers to programs
After this, you can add the performer/speaker/keynote, etc. information to the schedule.
Go to the Collection page and select
- from the first drop-down menu, select the desired production tool (in this case Bands) and
- from the second drop-down menu, select the desired performer
- When you have completed the information, press Save.
The program will appear at the assigned venue and time in the program schedule view.
When a performer is added to the program schedule, the information also appears on the performer's own page: the schedule includes the date, time, and location of the program.
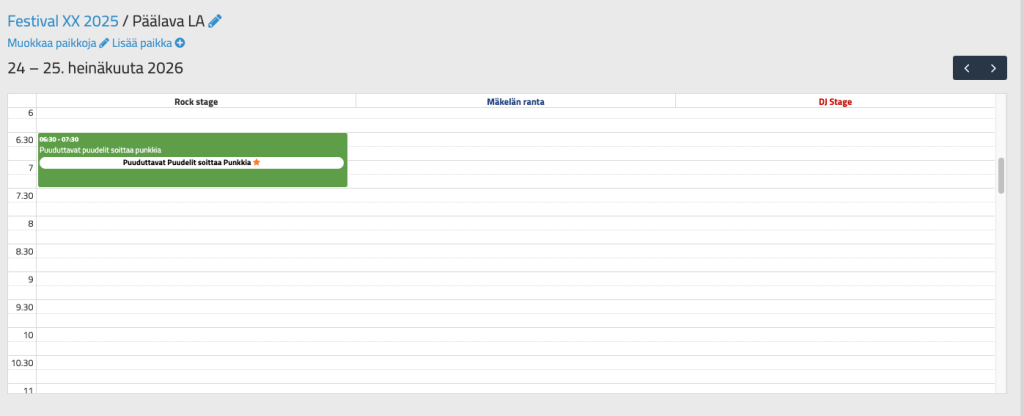
A finished program schedule might look like this:
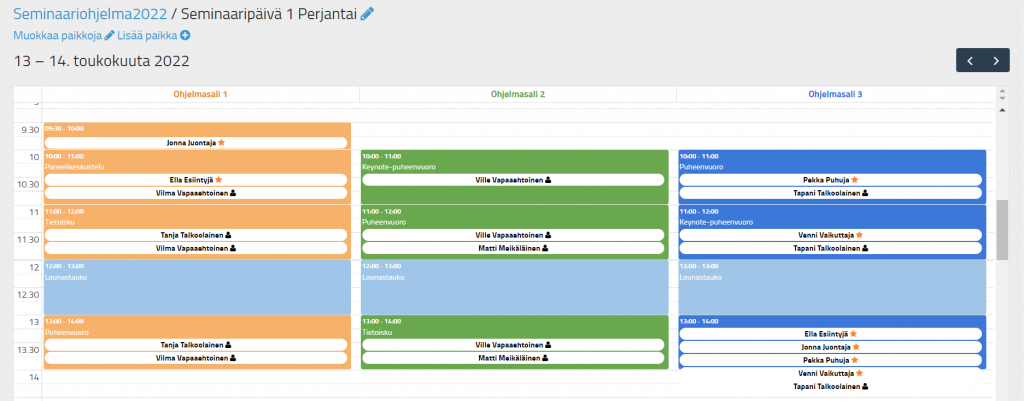
A schedule template creates a seamless overall view of the event program, making it easy to follow the progress of the program on the day of the event.
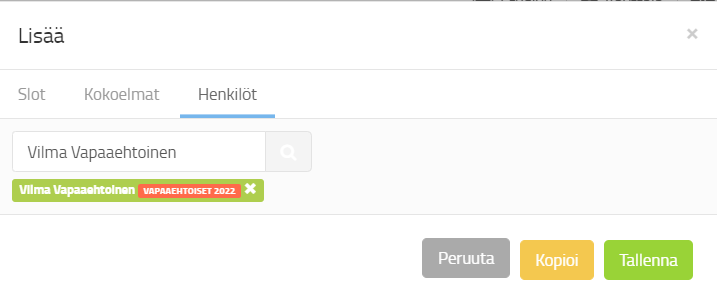
4. Connecting people to programs
People from various personnel groups can also be added to the program. These can be, for example, event employees or volunteers. For example, it is a good idea to mark the MC this way.
You can add people by clicking on the program in the schedule template. CastOn the tab, you can search for the people you want to add to the program in the search field. Finally, press Save.