Products
In GEST, products can be assigned to different groups of people in a project, such as employees, volunteers or artists. People can also purchase products on registration forms using payment functions. Products can be, for example, passes, food or admission tickets, as well as gift bags, shirts, and JV vests. Products purchased by a person or assigned to them are visible in the person's information in the person group view.
Products can be found in the top bar User accountfrom the menu ProductsYou will see a list of all products created for your account in this view. You can also edit the capacity of products or archive them, i.e. delete them.

Product creation
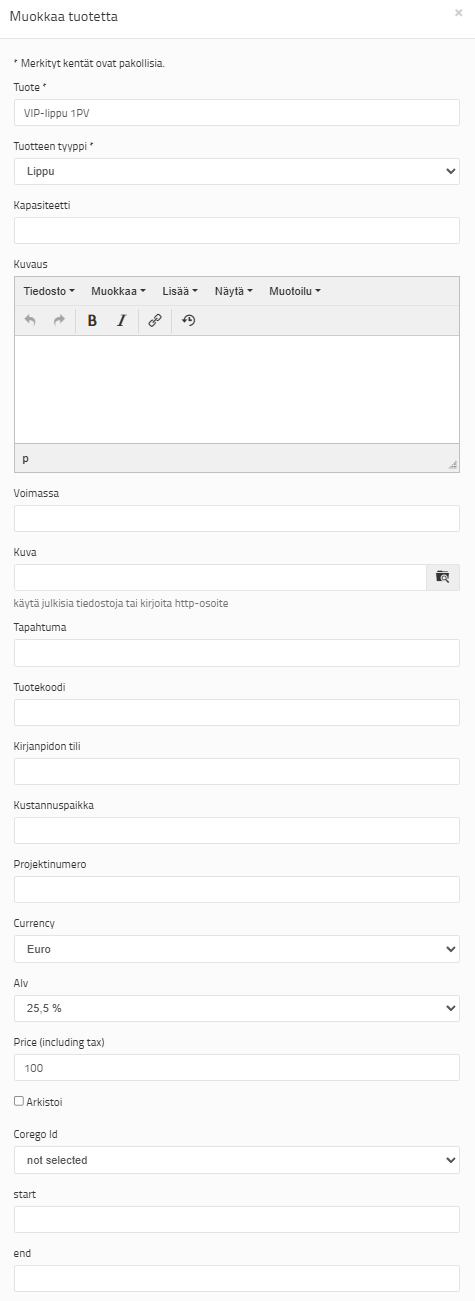
You can create products by clicking the Add new button.
- Name the product and select its type. The options are ticket, wristband, passport, item, avec or other. Selecting a product type makes it easier to group products and collect statistics.
- You can register the product capacity product information statistics for. The final capacity is determined from another point and it is discussed below.
- In addition, products can be specified by, for example, QR codes, place of publication and project number.
- Finally, select the correct VAT rate and final selling price for the product from the drop-down menu, which includes the VAT percentage you have chosen. If the product is free or it is a reservation (e.g. table reservation), leave the fields blank.
Note Always create new products for a new event/new year and archive the old ones. This way, statistics are not confused by old products or old forms. We recommend adding the year after the product.
Products can be assigned to people in the person group view. You can find more information about adding products and payment features in Payment features
Product capacity
You can set a maximum capacity for a product, which is also displayed in the statistics view together with the issued and collected products. The maximum capacity can be edited later if necessary. The capacity is reduced when the product is purchased via the registration form (Paytrail). Only an externally made reservation changes the capacity. Capacity is not reduced if the product is provided internally in GEST, e.g. through the Let's go menu, or if it is a free product.
To set the product capacity, press the capacity button with a green background in the product row.

Book AmountEnter the maximum amount you want to sell the product for. Then select code type from the drop-down menu. Any of the options is acceptable.
If the product you sell or give out there is no a product that is read by devices (e.g. Corego reader devices), select Blank. Products whose use is not monitored by codes and readers are like this (e.g. gift bags, tangible meal tickets, work shirts). However, if the product is scanned onto the user's chip bracelet, QR code and their use is monitored, the code type must be something other than blank. Finally, press Generate.
The desired number of products will then be listed on the Capacity page. From here you can manage products in bulk or individually.


The most essential functions in capacity management are
Booked: The producer can reserve/book products internally. For example, if you want to keep a certain number of products freely available or do not want to release all products for sale, you can reserve them by selecting the desired products and pressing Booked.
Clear: With the Clear function, you reset the status of the product and release it back for sale, e.g. after testing or if the customer cancels the reservation.
Delete: The function deletes the row, the product and thus reduces the quantity of products to be sold.
Reserve and Cancel do not affect capacity.

Once the product is fully booked or purchased, it can no longer be selected.
Changing capacity
If you want to increase capacity, do it according to the following example:
The existing capacity for the product is 50 pieces. You want to add another 20 pieces. Therefore, the final capacity amount would be 70 pieces. So if you want to increase the capacity to 70 pieces, go to capacity, enter 70 pieces in Amount, and select Empty as the code type.
This does not increase the amount by seventy, but rather increases the amount to seventy, i.e. up to the desired amount. So if you want to increase the amount, enter the final amount in the Amount field.
If you want to reduce capacity, you can do it in two ways
- On the Capacity page, select the products you want to delete that are not already selected and press Delete. This will reduce the number of products and capacity.
- Enter the new, smaller capacity in the Amount field.

Adding products for people
In addition to items for sale, products can also include wristbands, passports, driving licenses, accommodation vouchers, etc. In this case, no price is given to the product when it is created. Products can be assigned to a person either through the Let's go menu or by clicking on the person's information. Select the desired product and the number of products from the drop-down menu.
You can also give products to multiple people at once via the Actions menu on the home page. Select Add product and press Let's go.
All added products appear both in the person's status and when checking them in, so they can be handed over to the right people.